OpenProject
Follow these steps to seamlessly integrate with OpenProject:
Generate an API Token
API Token User must be an Administrator.
-
Navigate to Profile Photo > Account Settings in OpenProject.
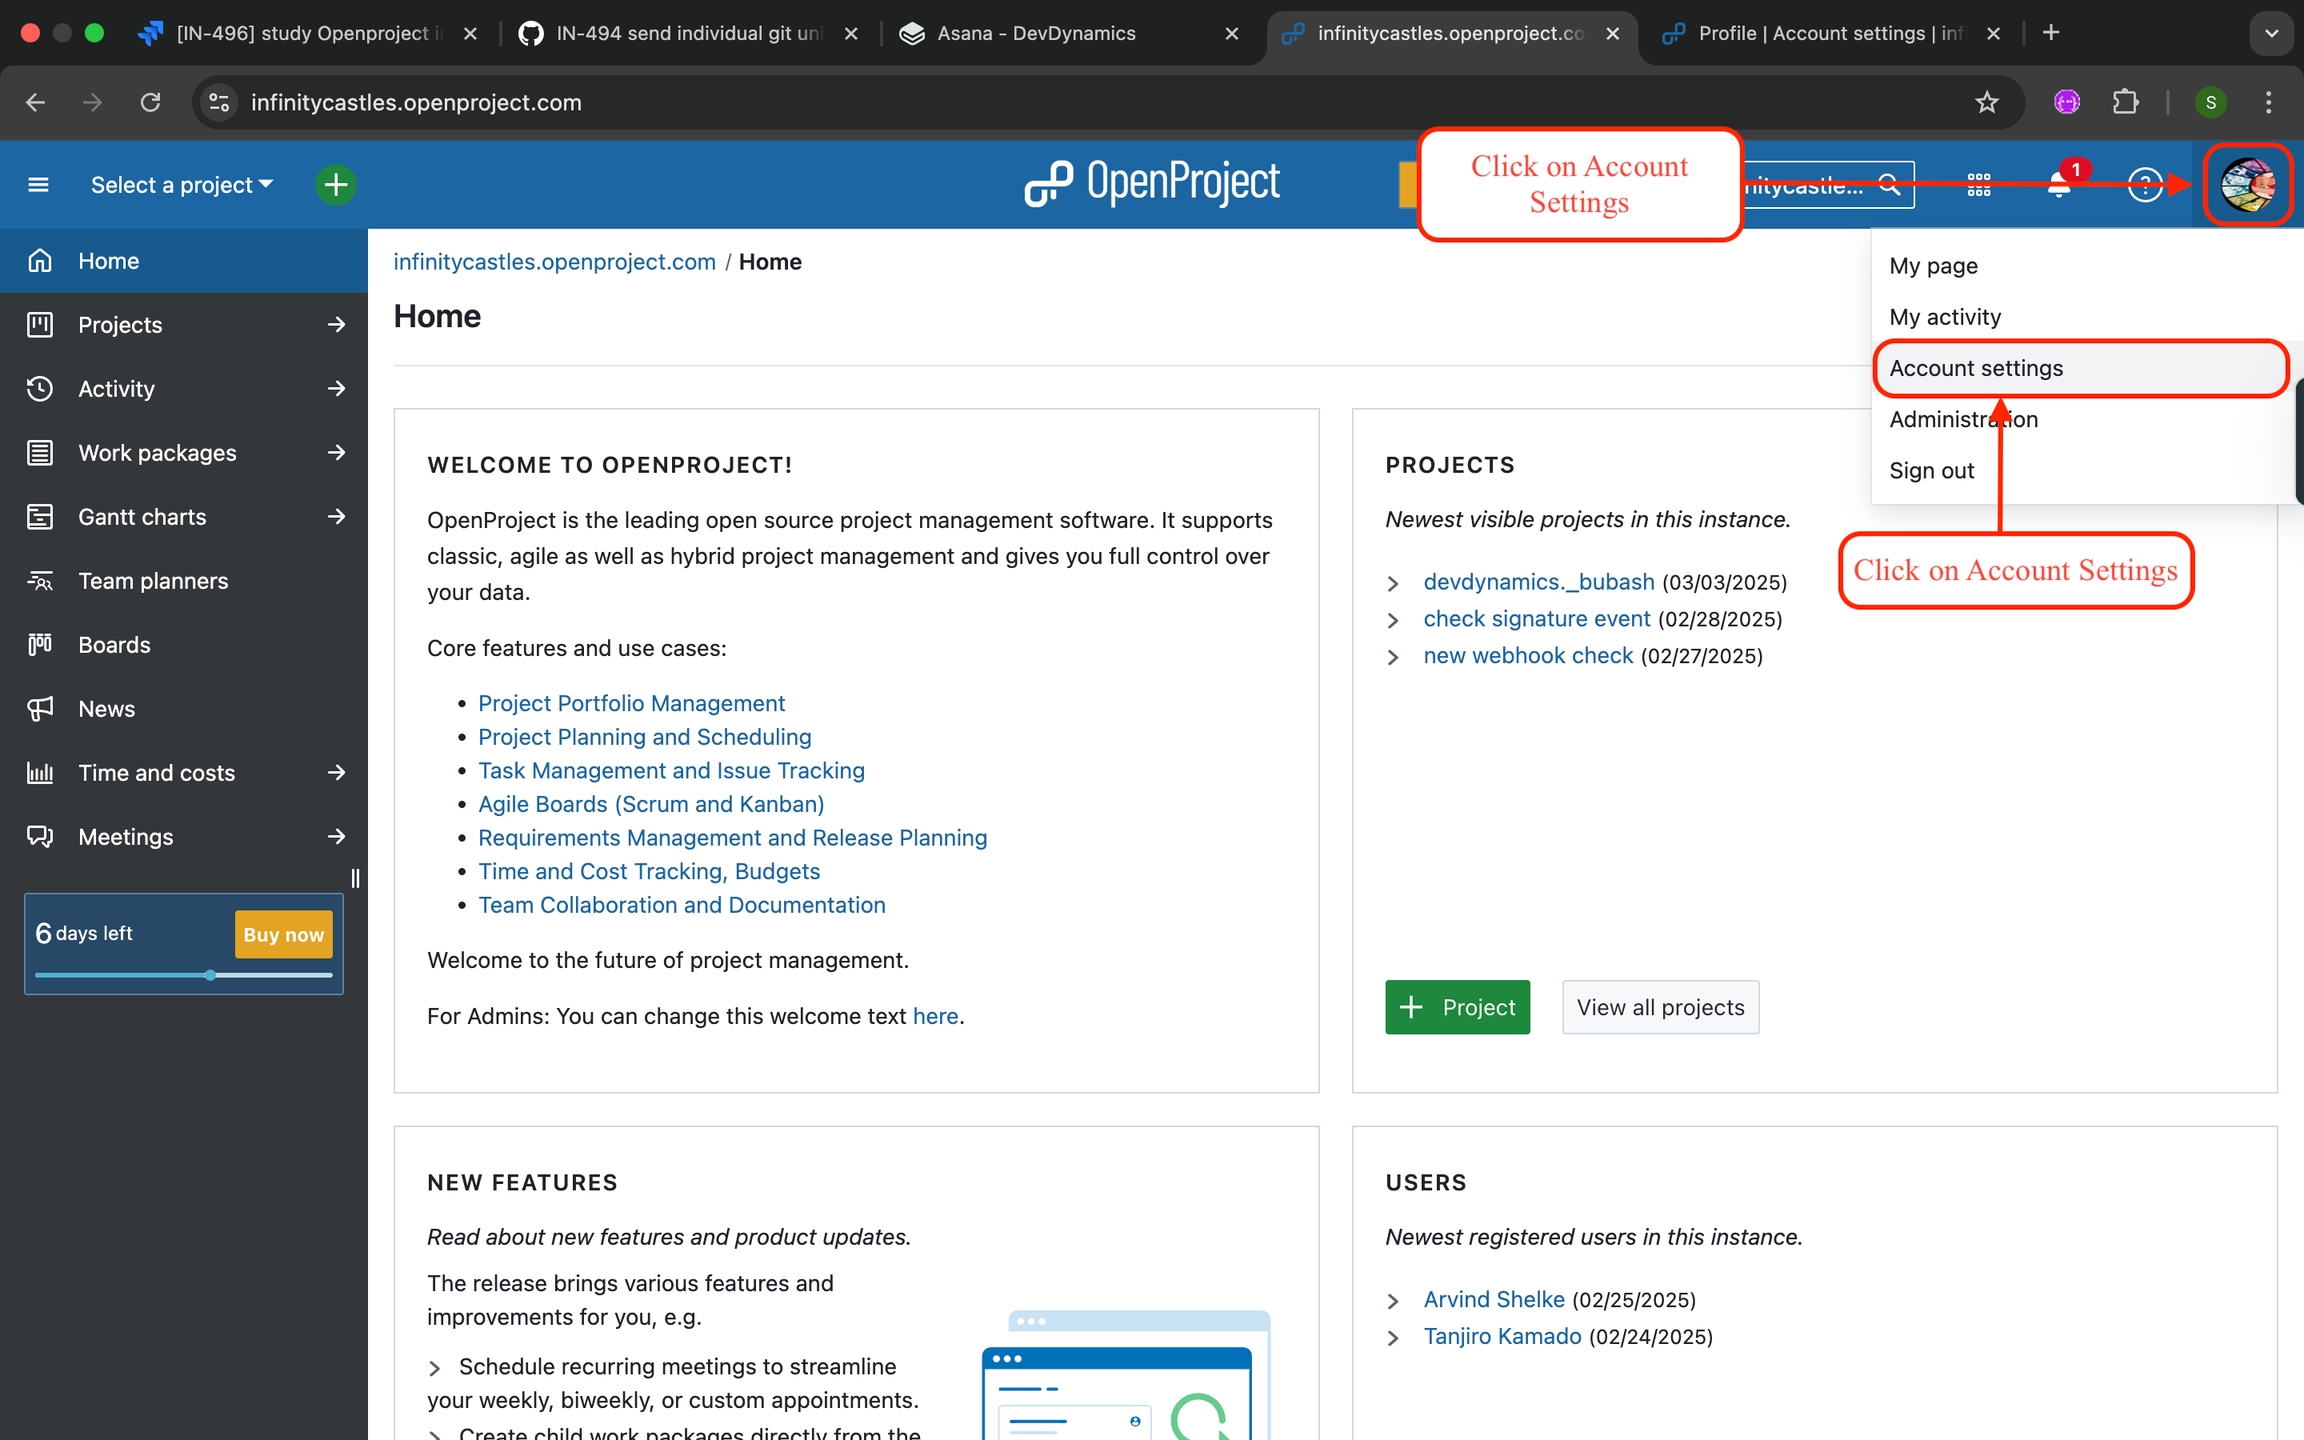
OpenProject Navigate-to-Profile>Account-Settings
-
Navigate to Access Tokens.
-
Click on + API token to create new API token.
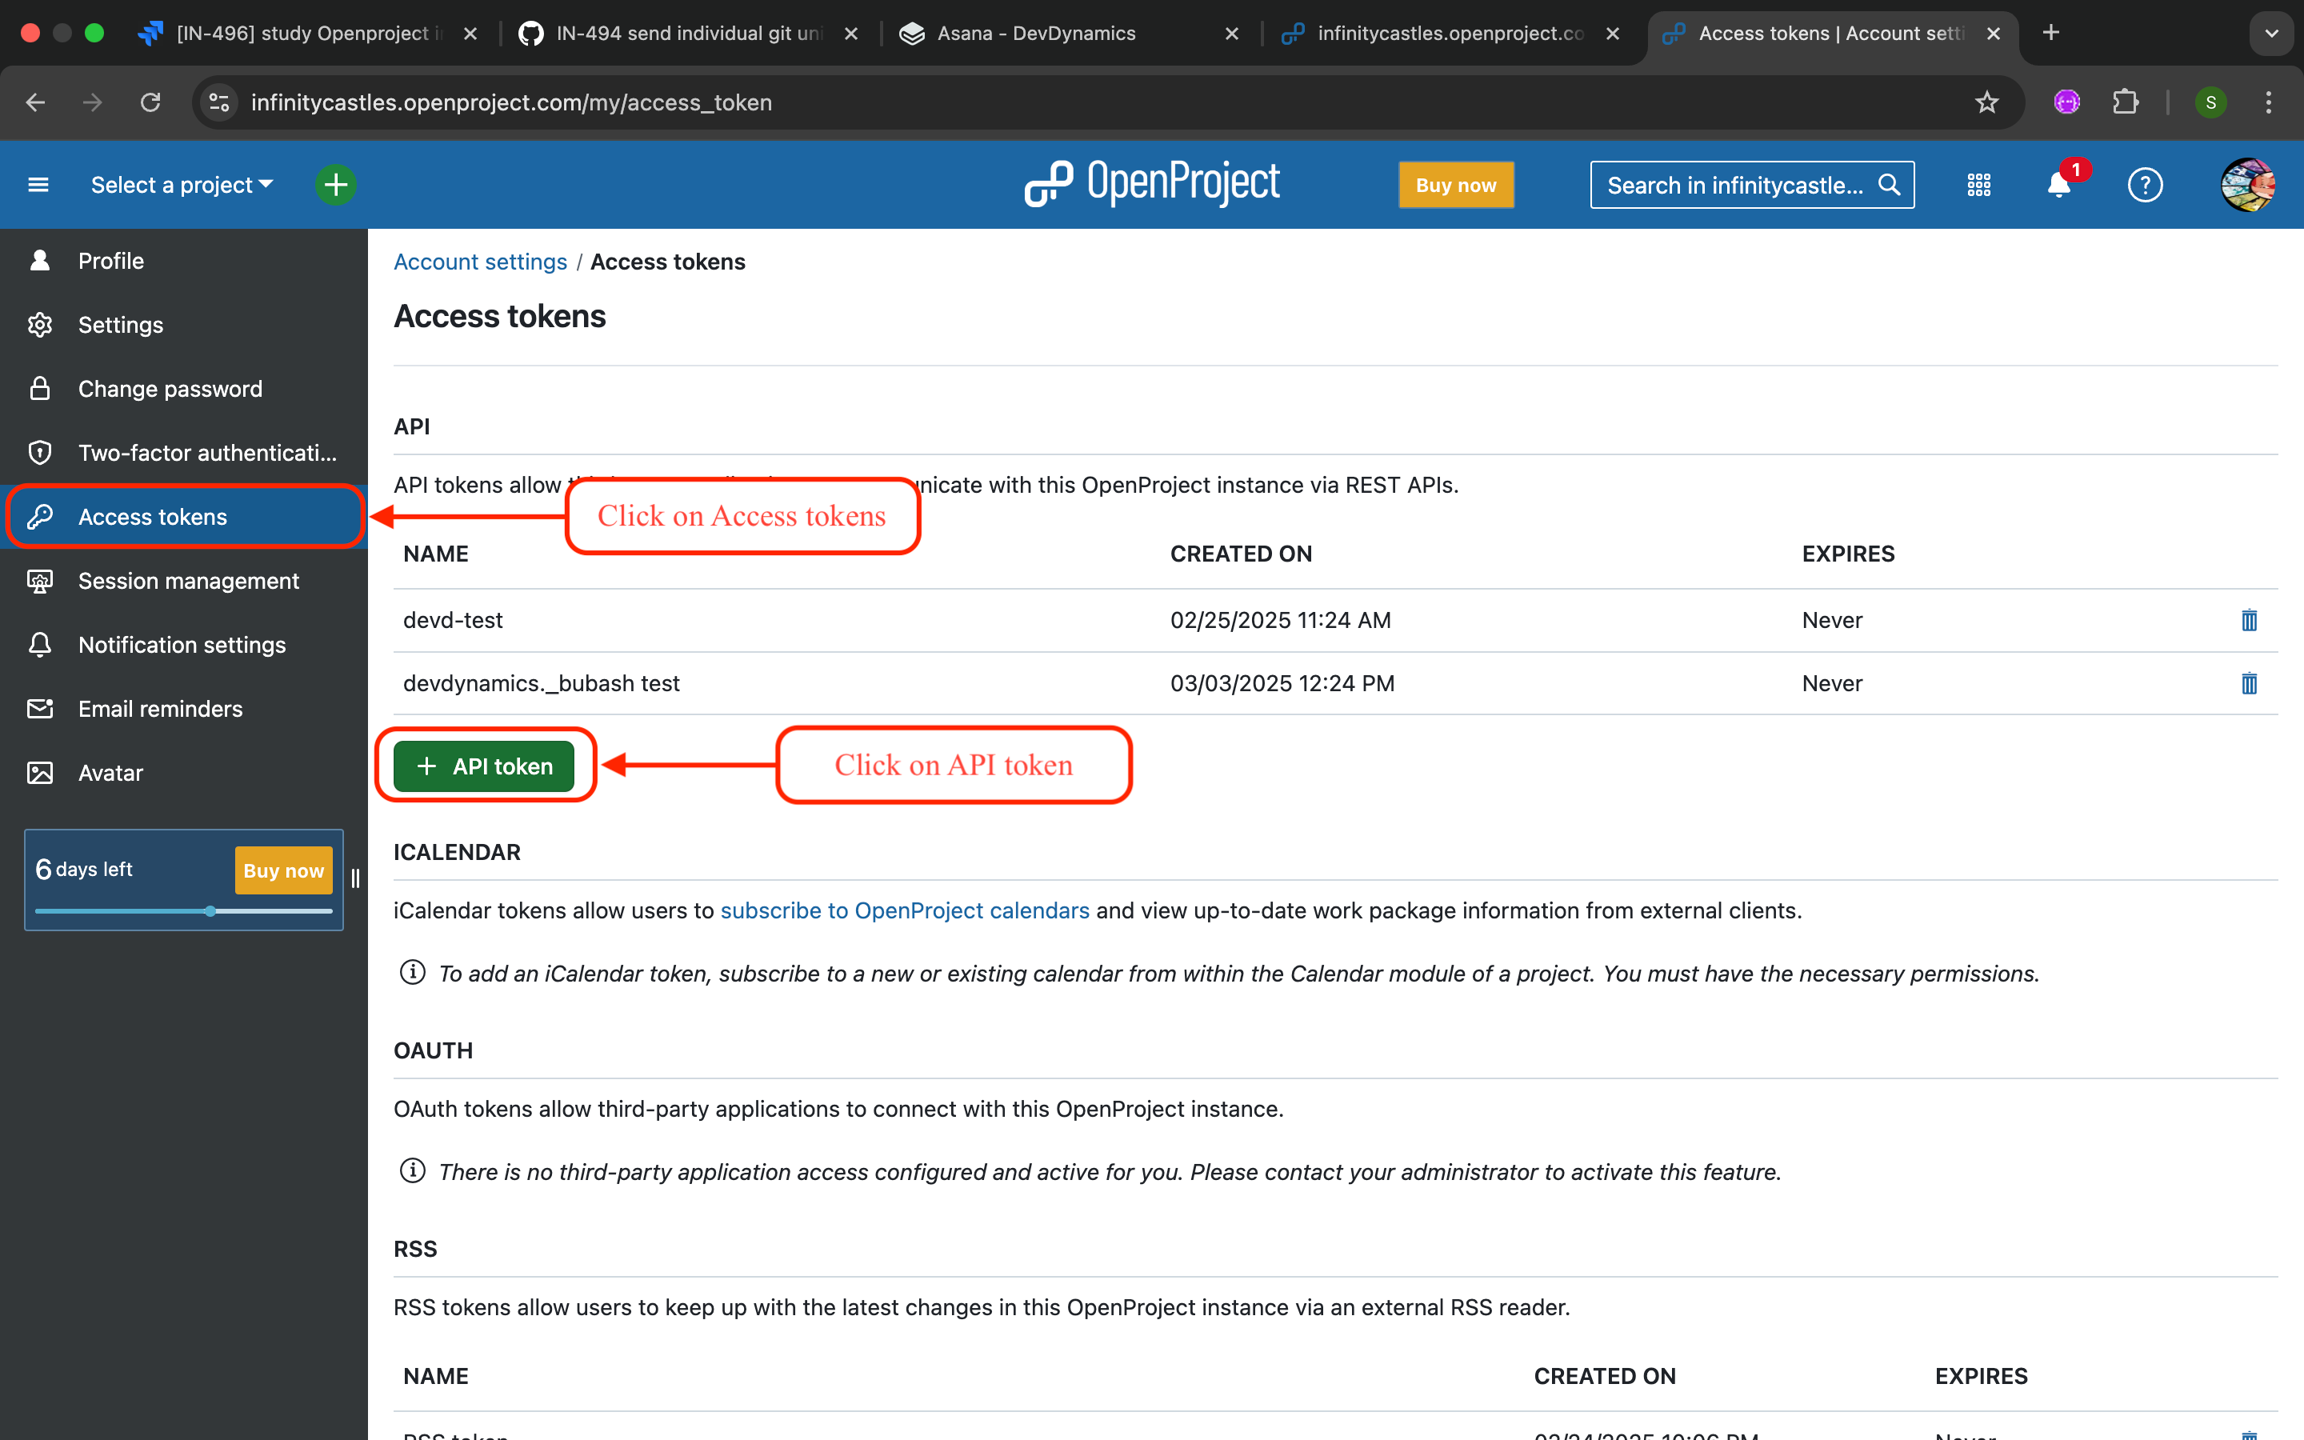
OpenProject-Navigate-to-Access-tokens-Chick-API-token
-
Assign a name to the token, for instance,
dd-token. -
Click on Create to create the API token.
This is the only time you will see this token, make sure to copy it now.
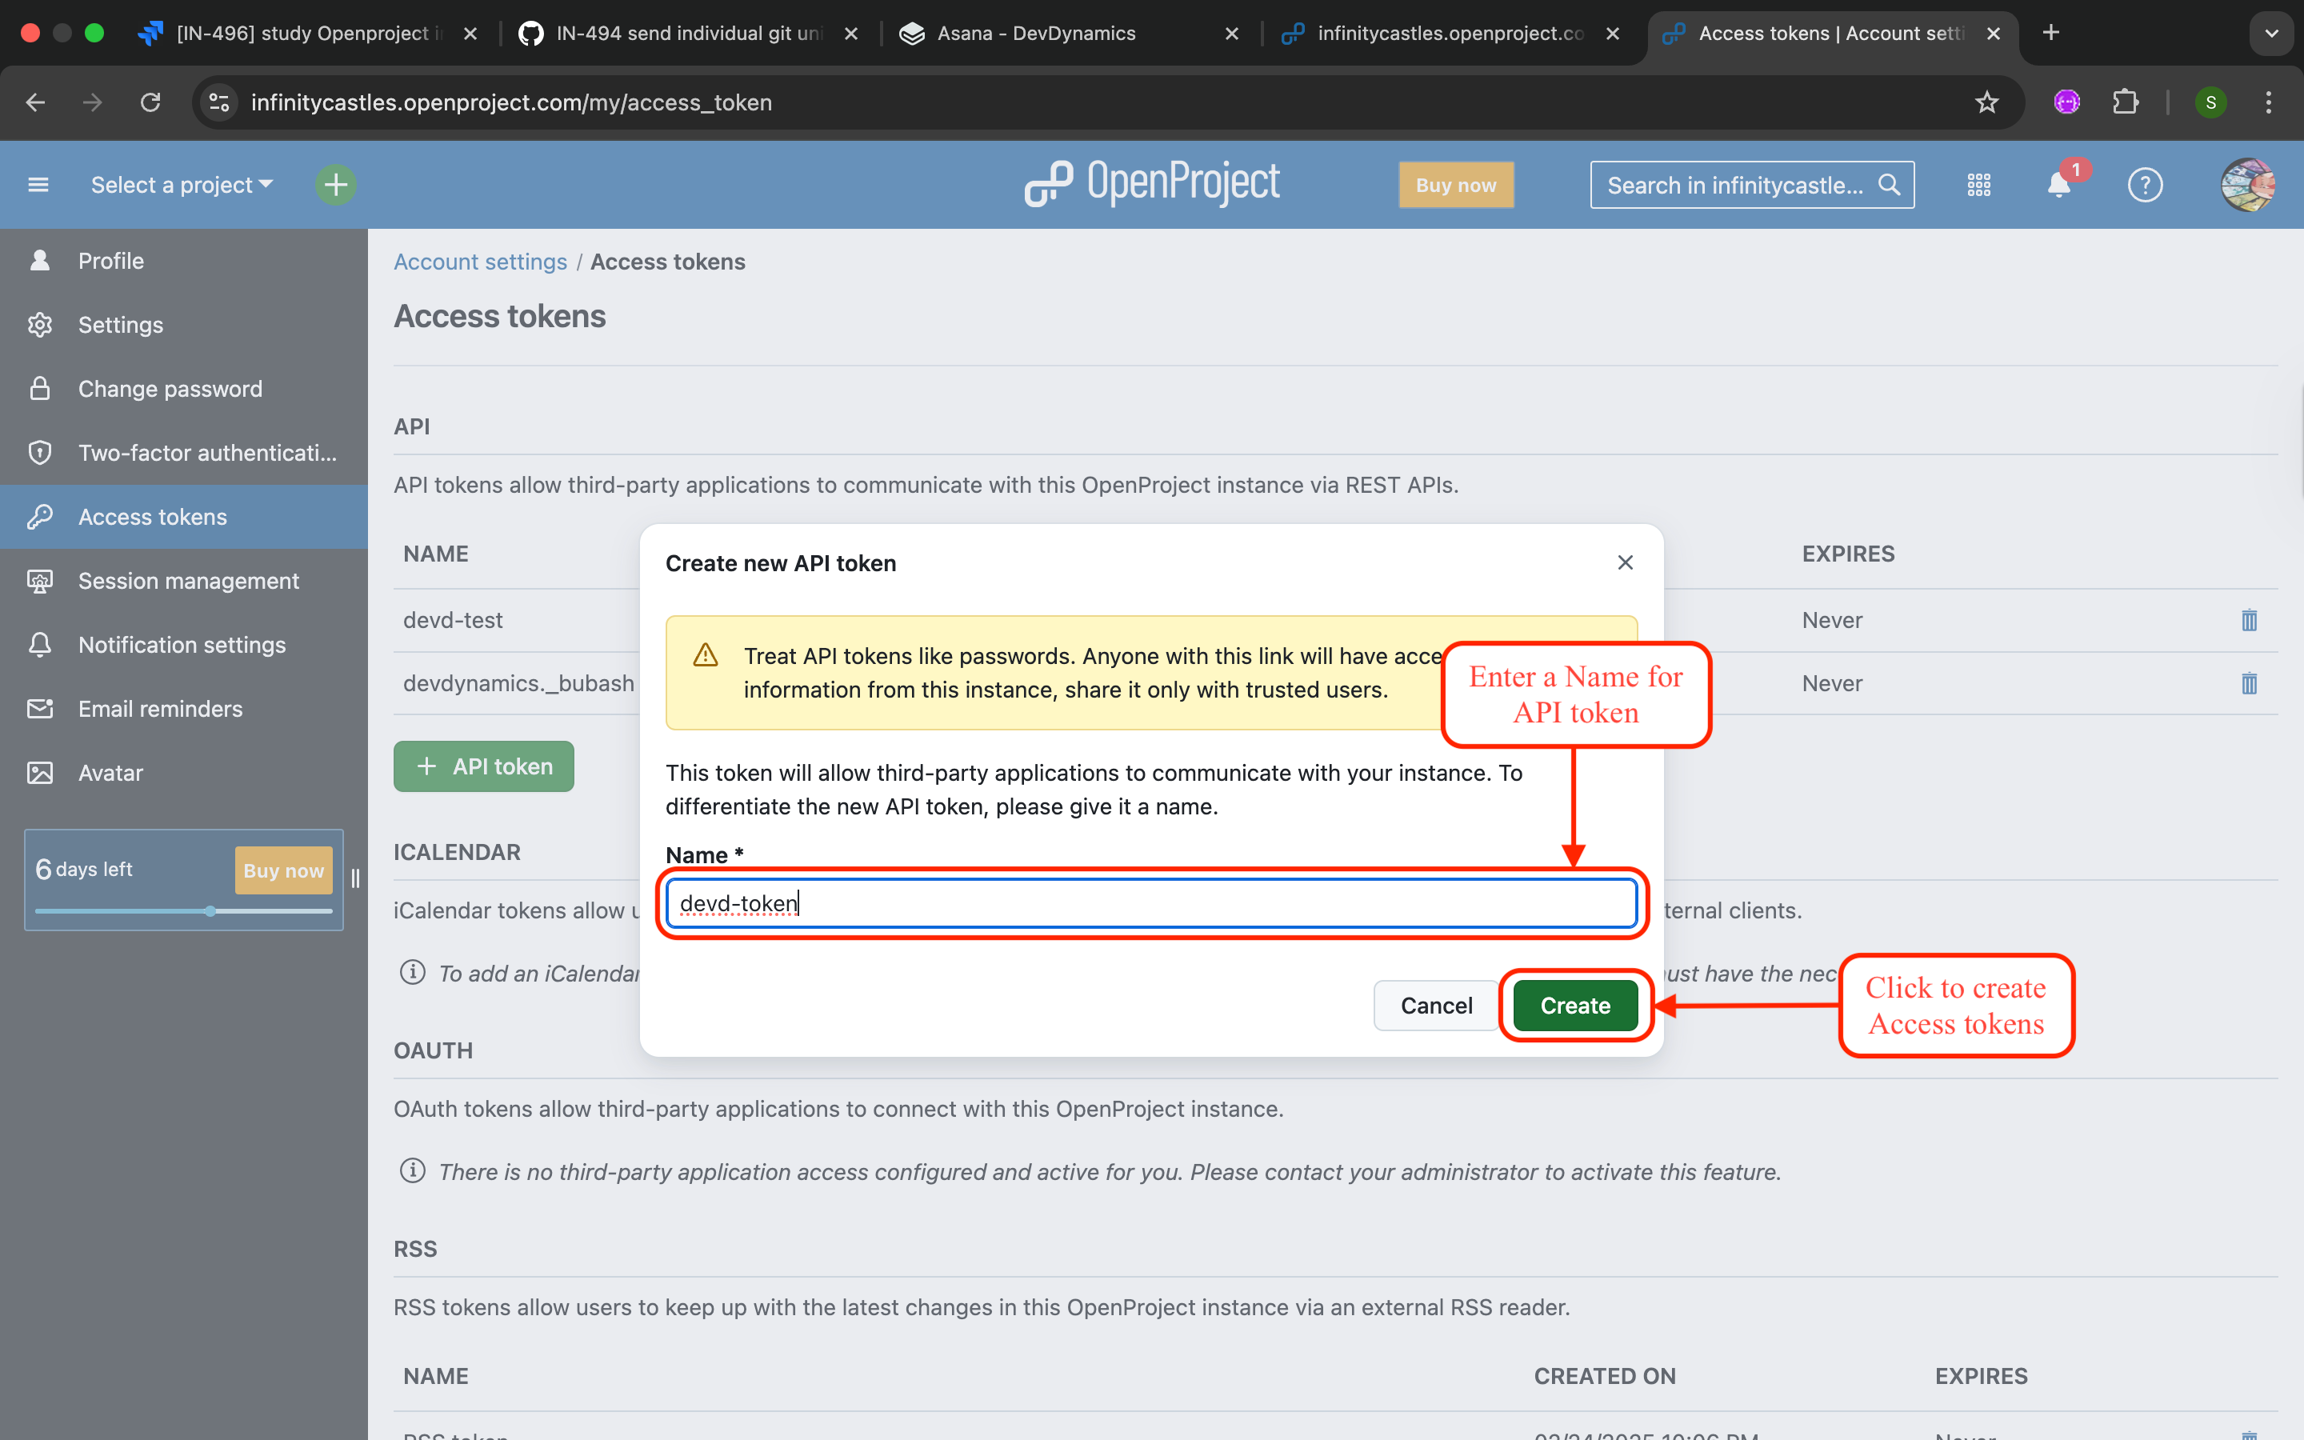
OpenProject-Enter-token-name-and-click-create
Create Webhook
Steps to Create a Webhook:
-
Navigate to Profile Photo > Administration in OpenProject.
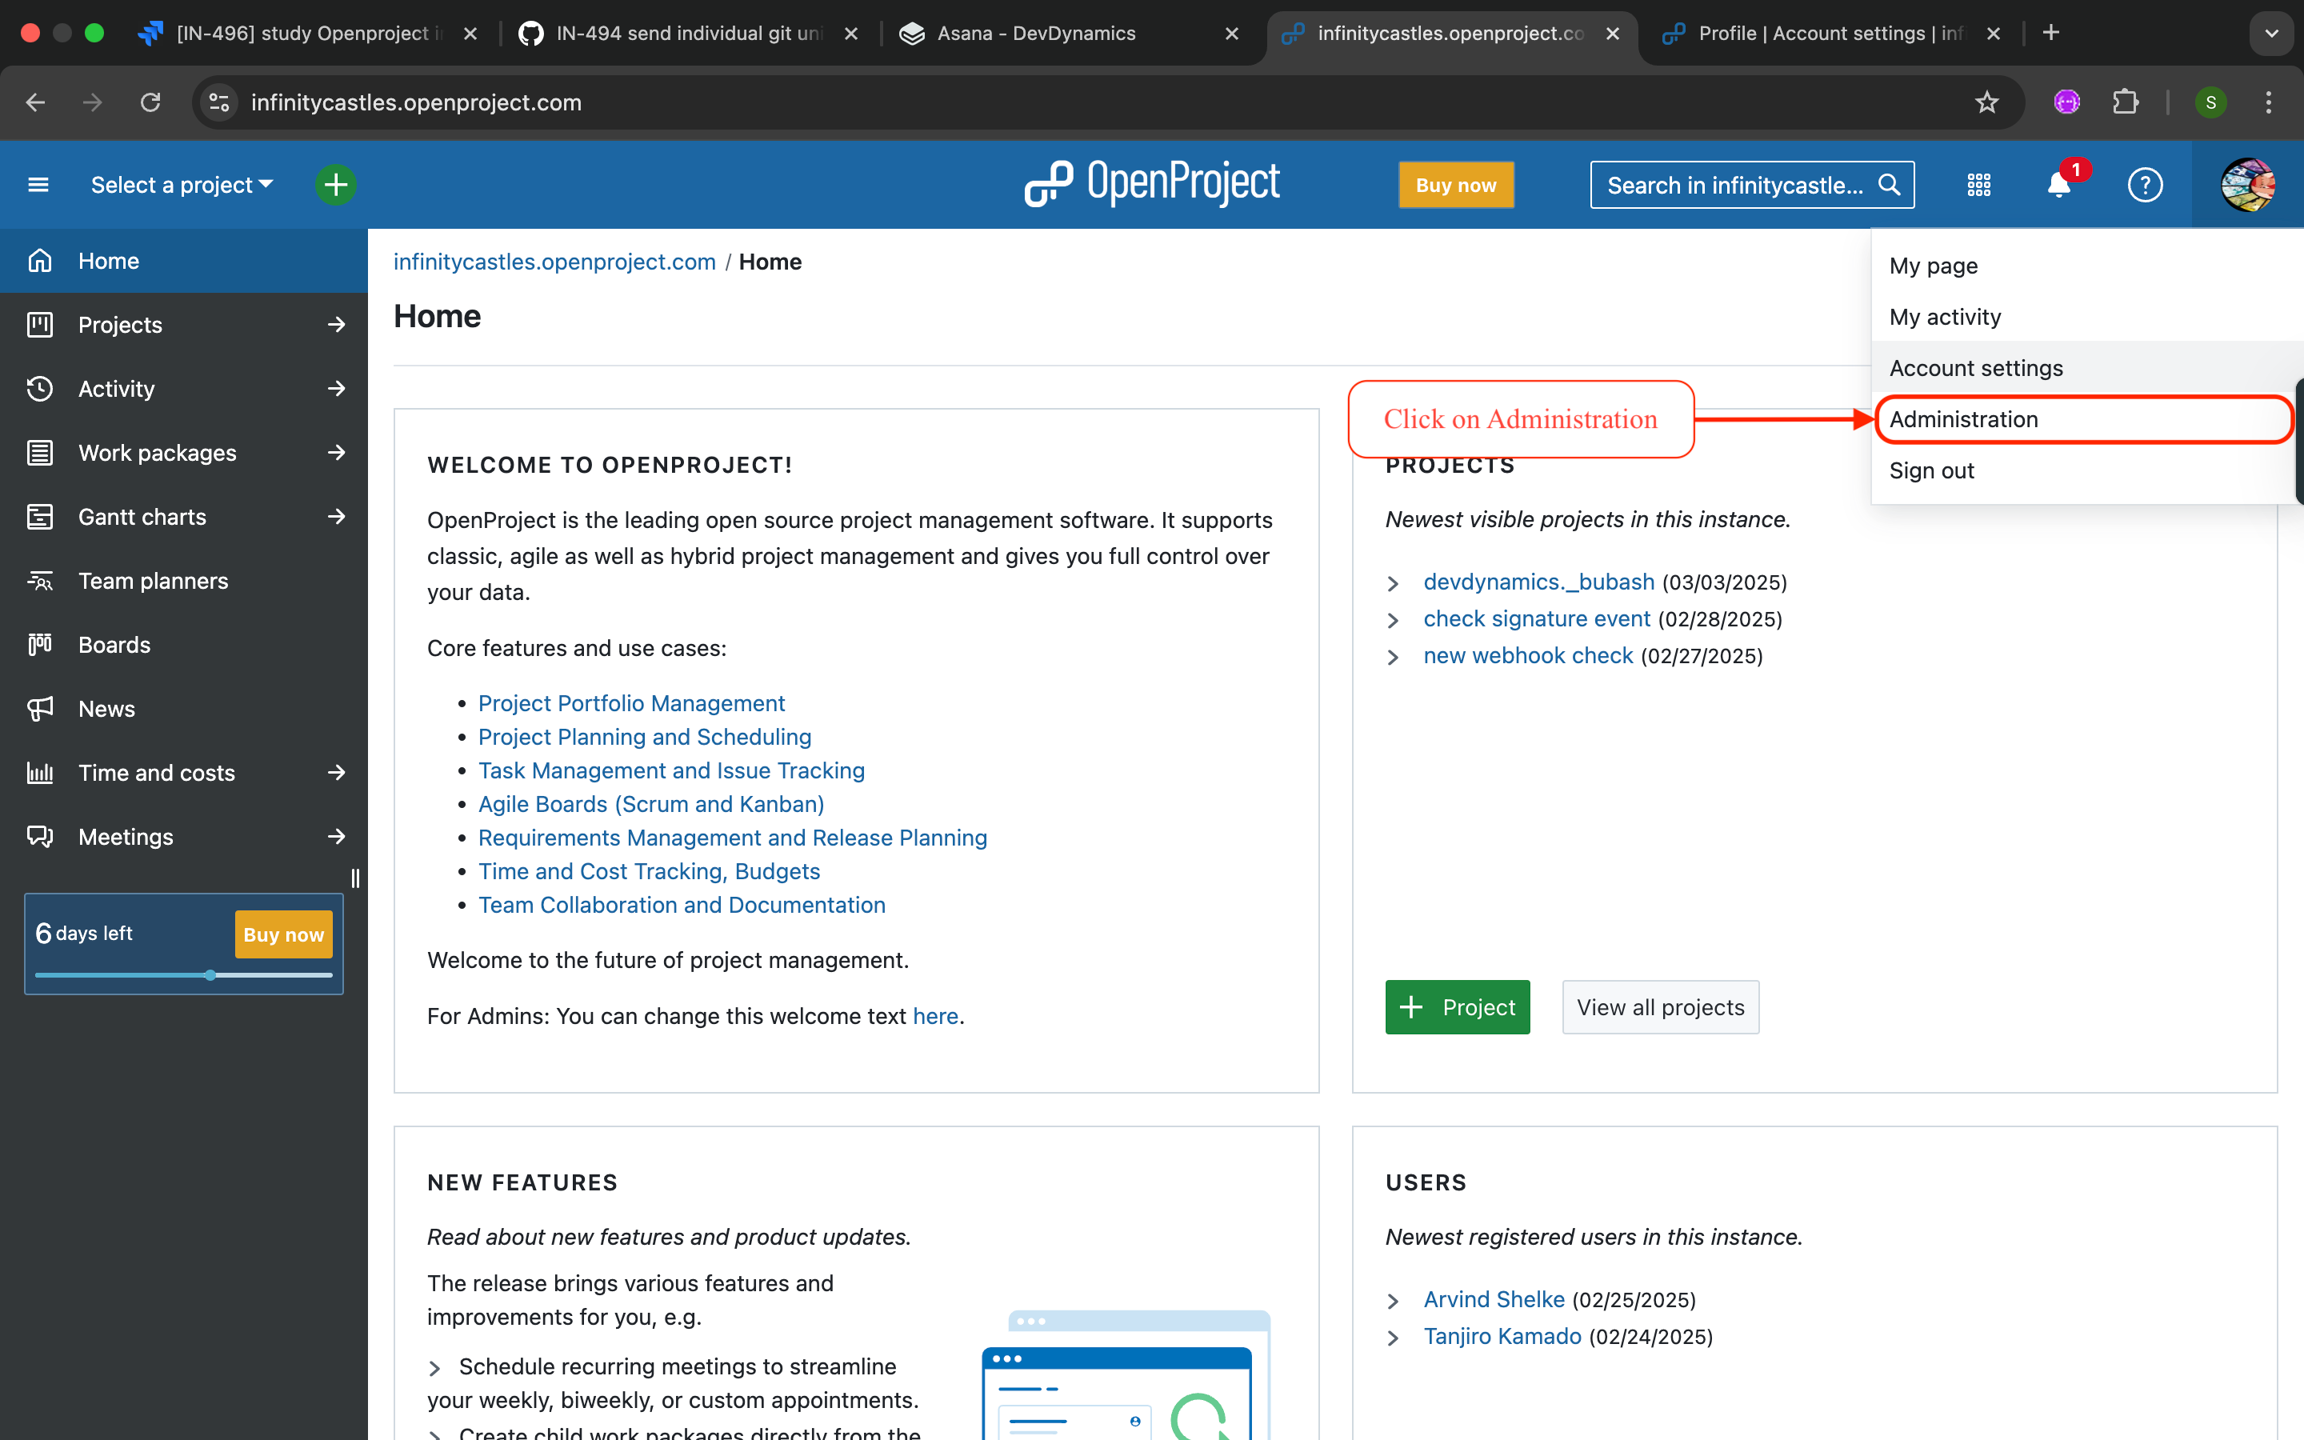
OpenProject Navigate-to-Profile>Administration
-
Navigate to API and webhooks.
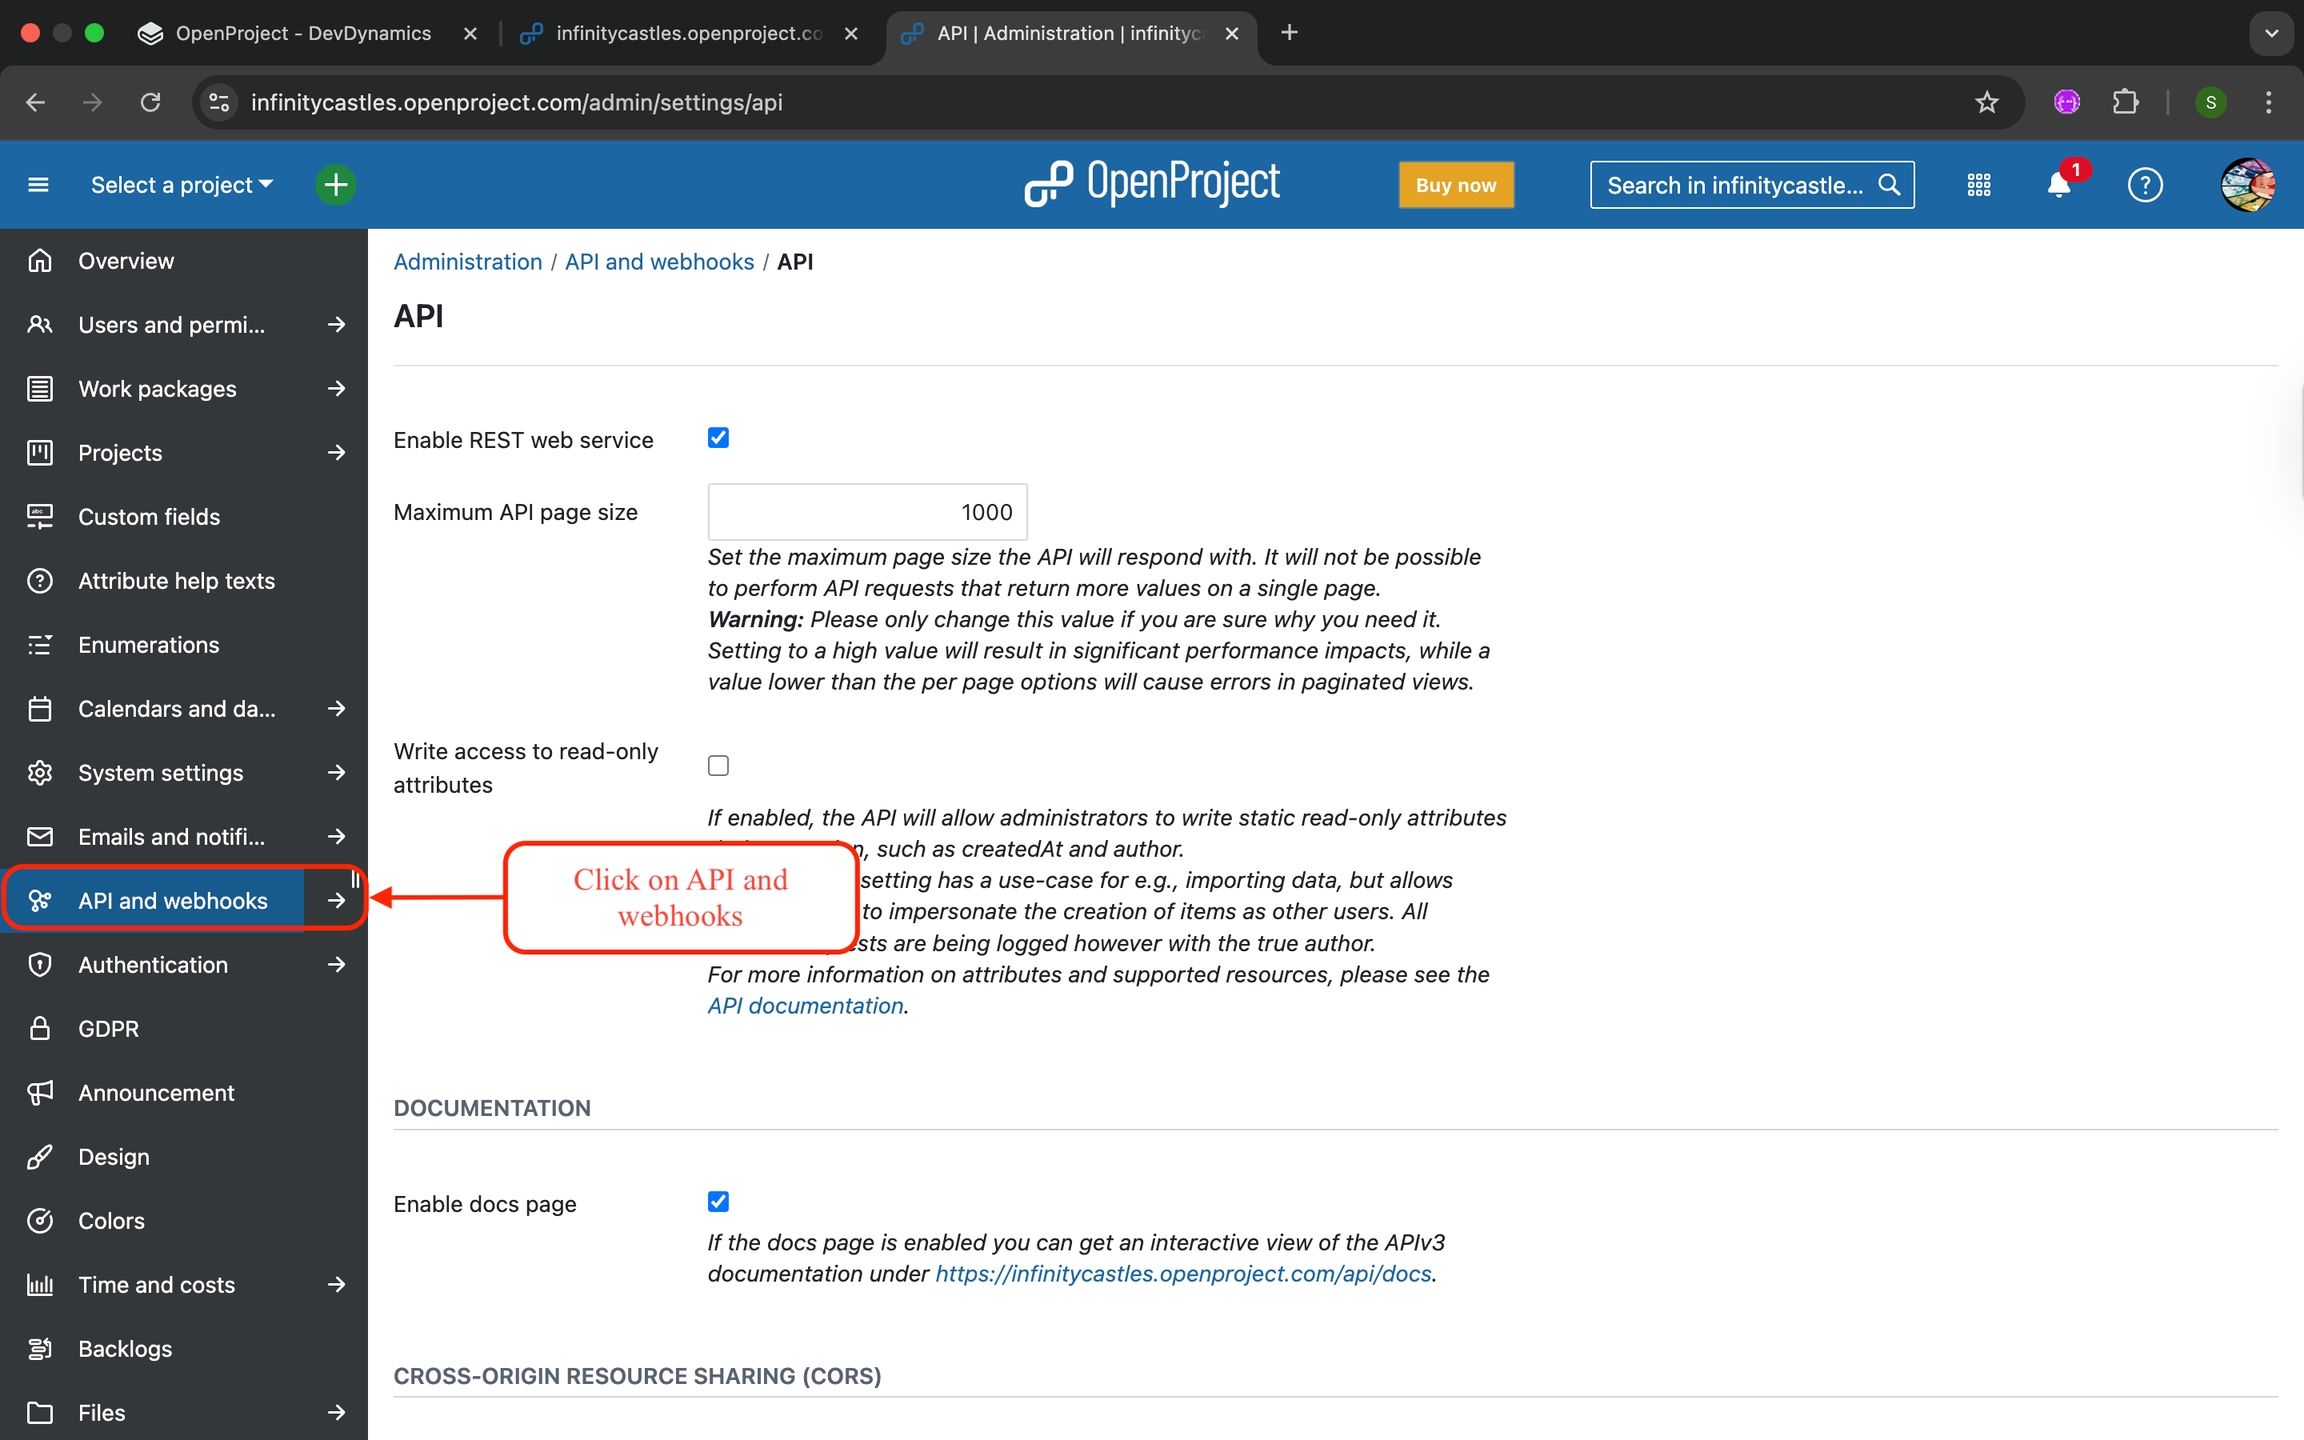
Navigate to API and Webhooks
-
Navigate to Webhooks and Click the + Webhook.
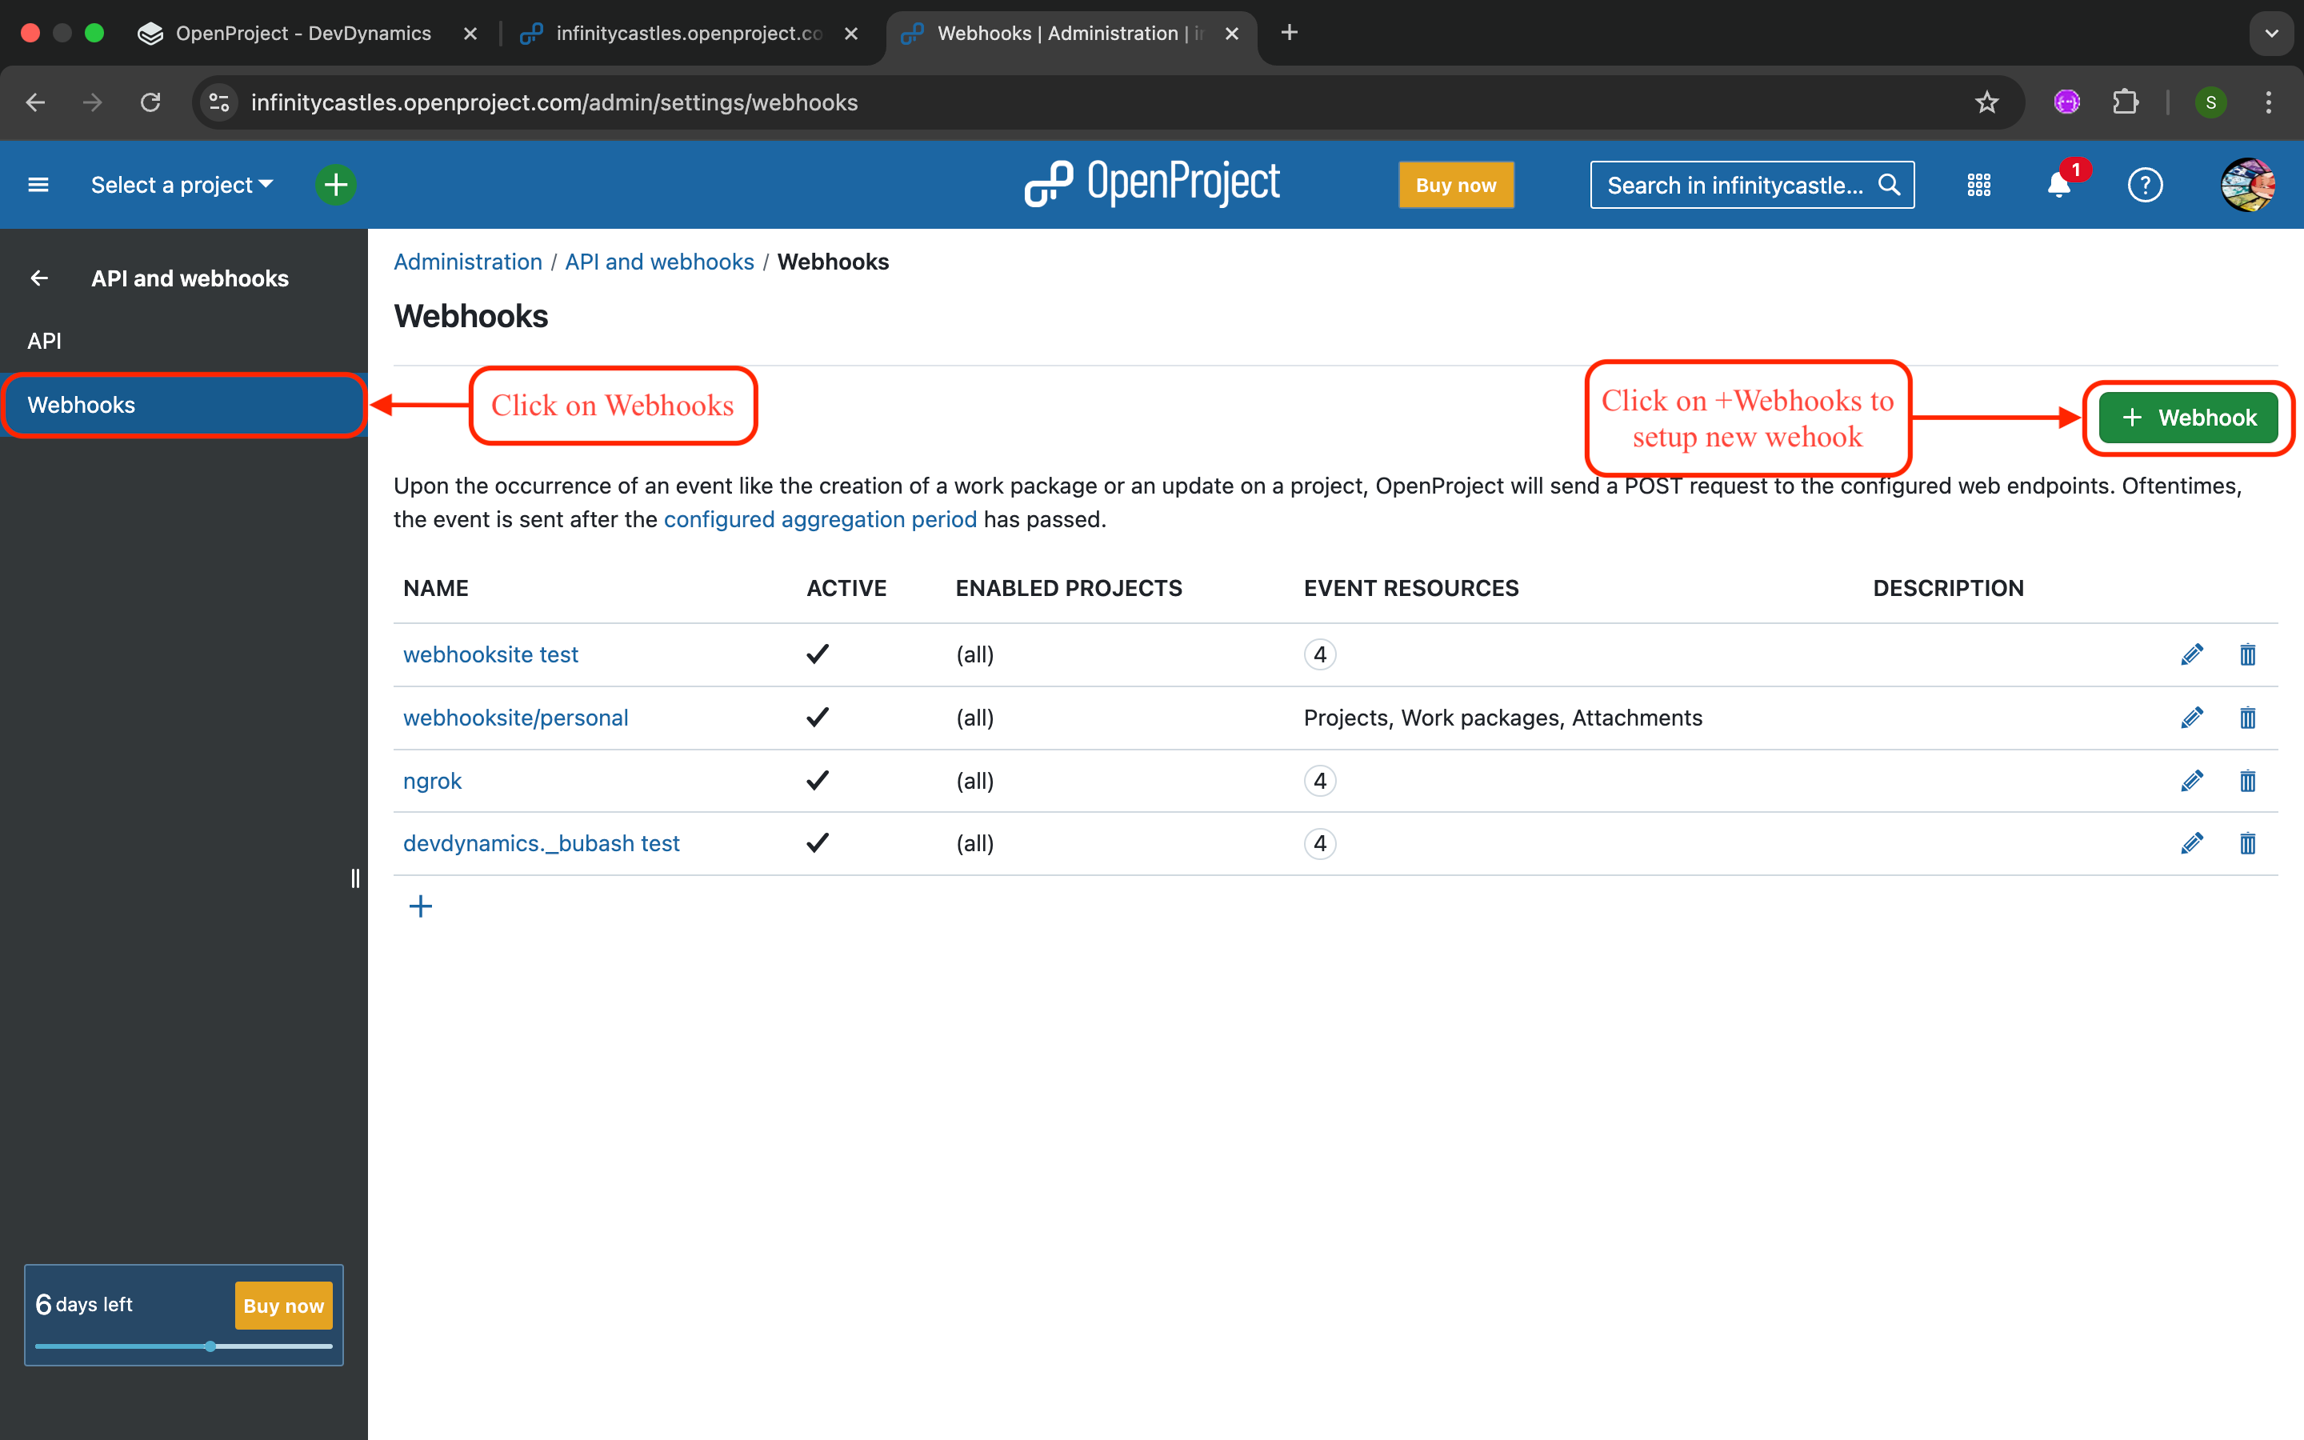
Navigate to Webhooks and Click the + Webhook
-
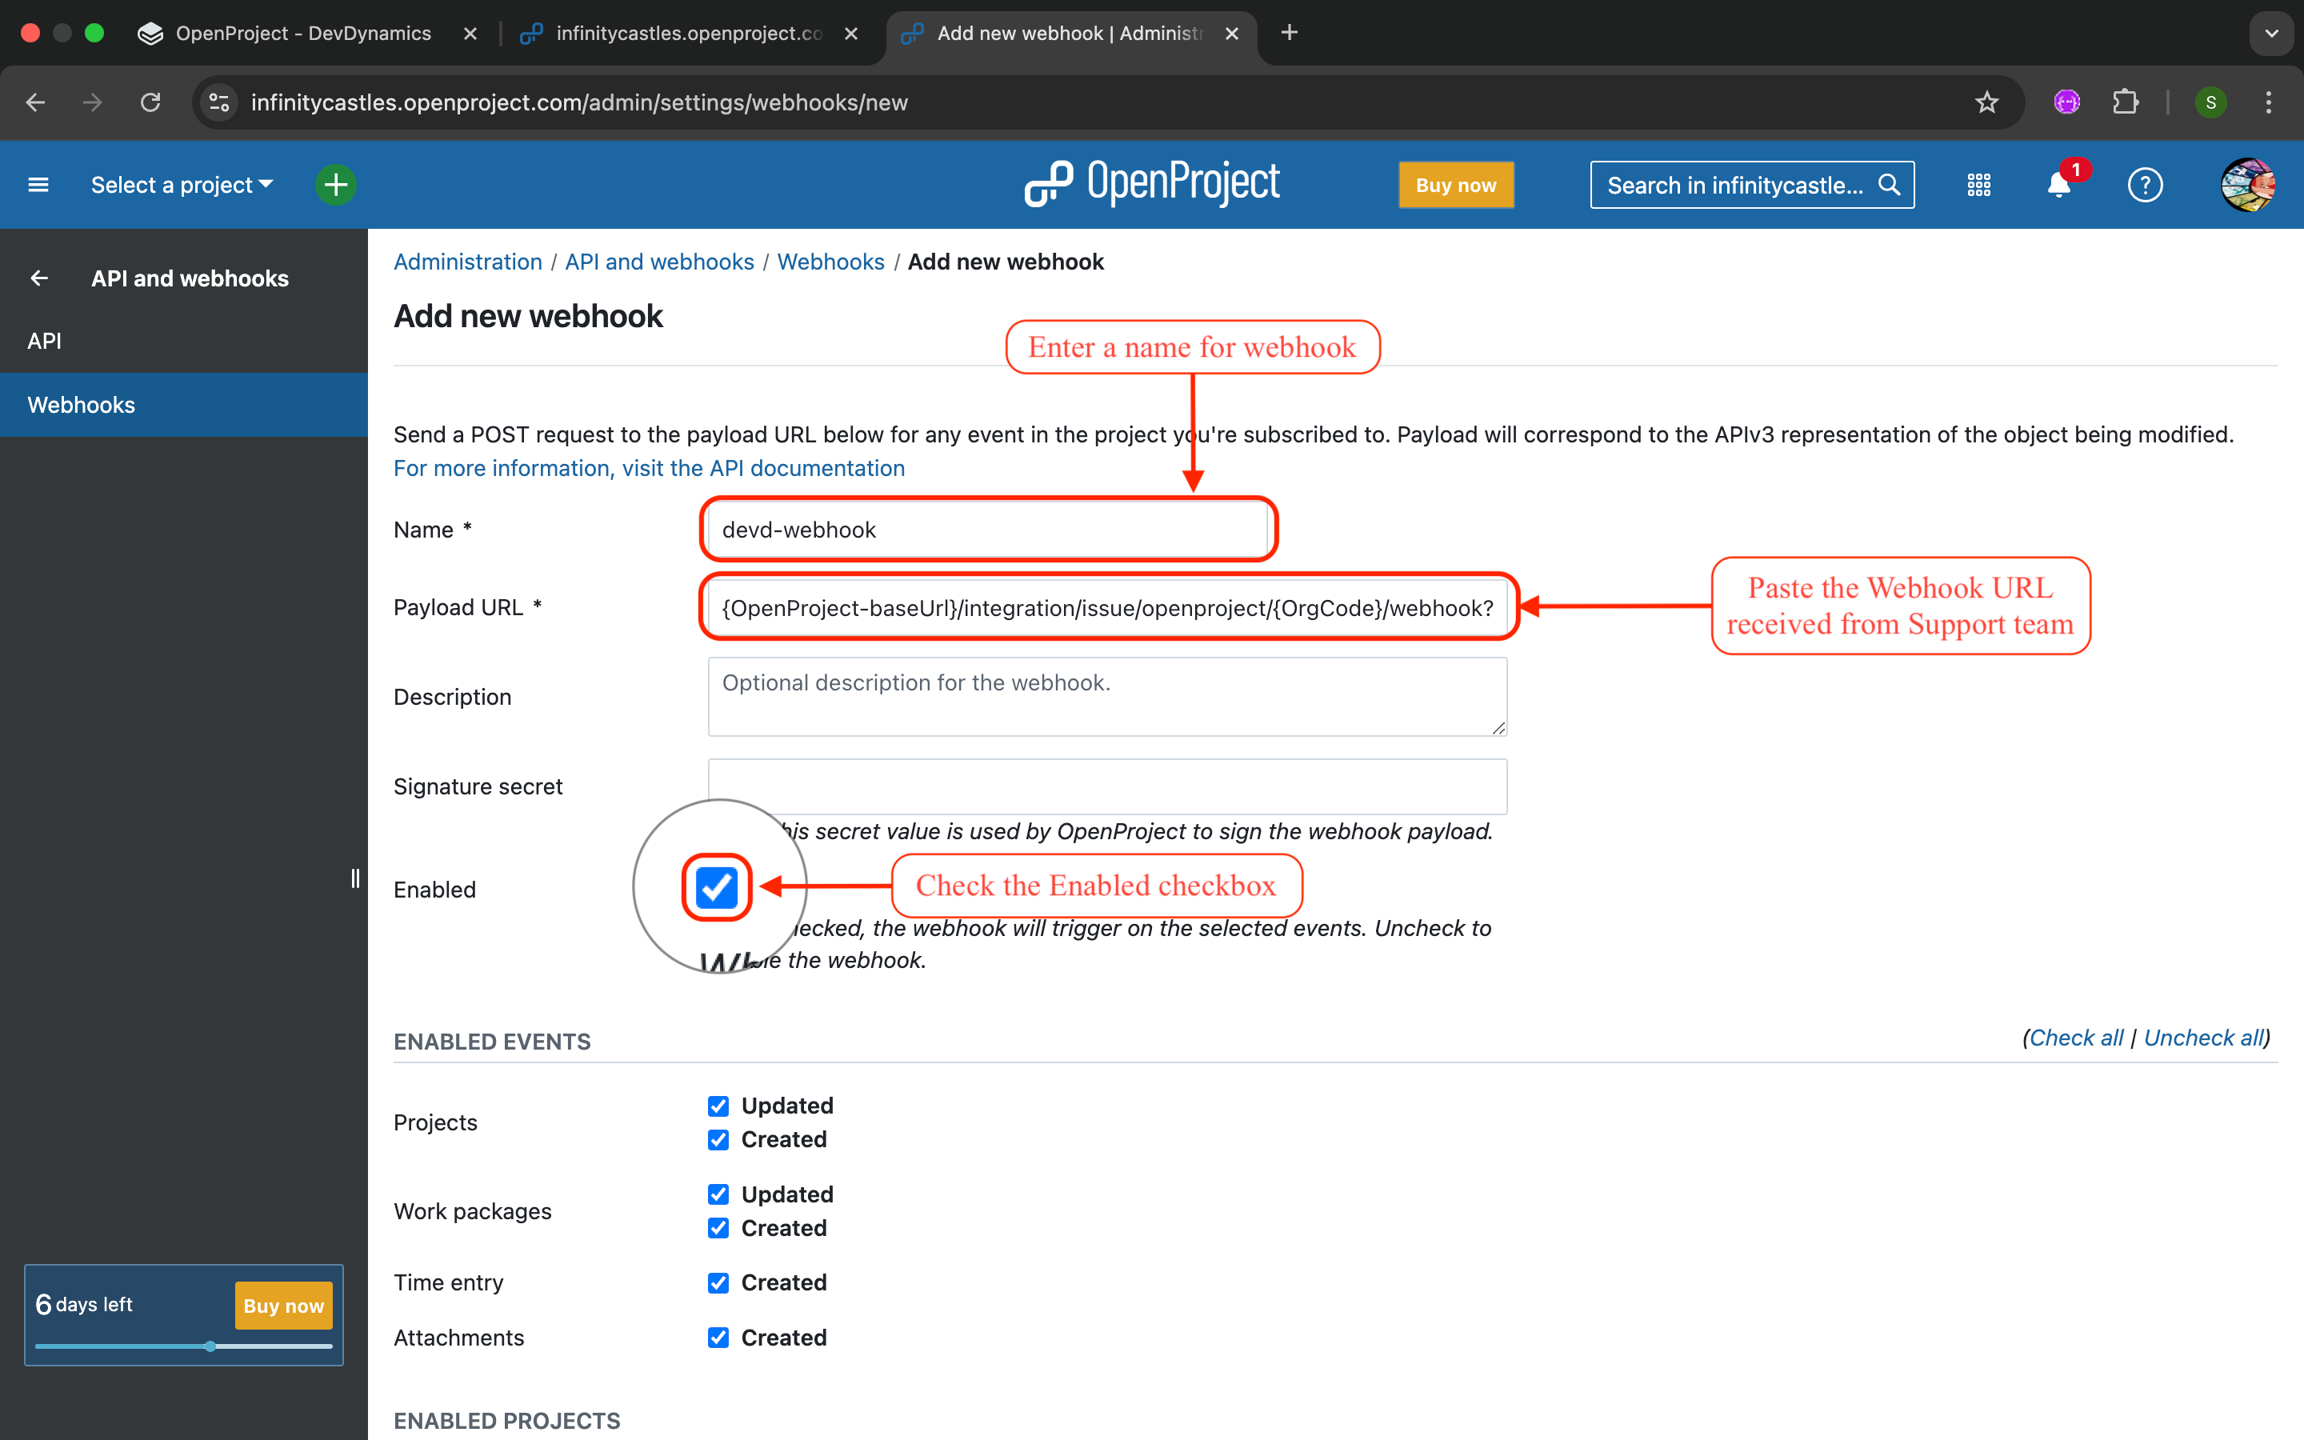
Enter a name for webhook, say
devd-webhook. -
Create the webhook URL for your organisation using the given template and paste it in Payload URL field.
- Template:
https://api.devdynamics.ai/integration/issue/openproject/{OrgId}/webhook?integrationKey={OpenProjectBaseUrl}OpenProjectBaseUrl: e.g.https://orgname.openproject.comOrgId: Get orgId from https://app.devdynamics.ai/settings/organisation
- Template:
-
Check the Enabled checkbox.
The webhook will trigger on the selected events only when the Enabled checkbox is checked.
Fill webhook details
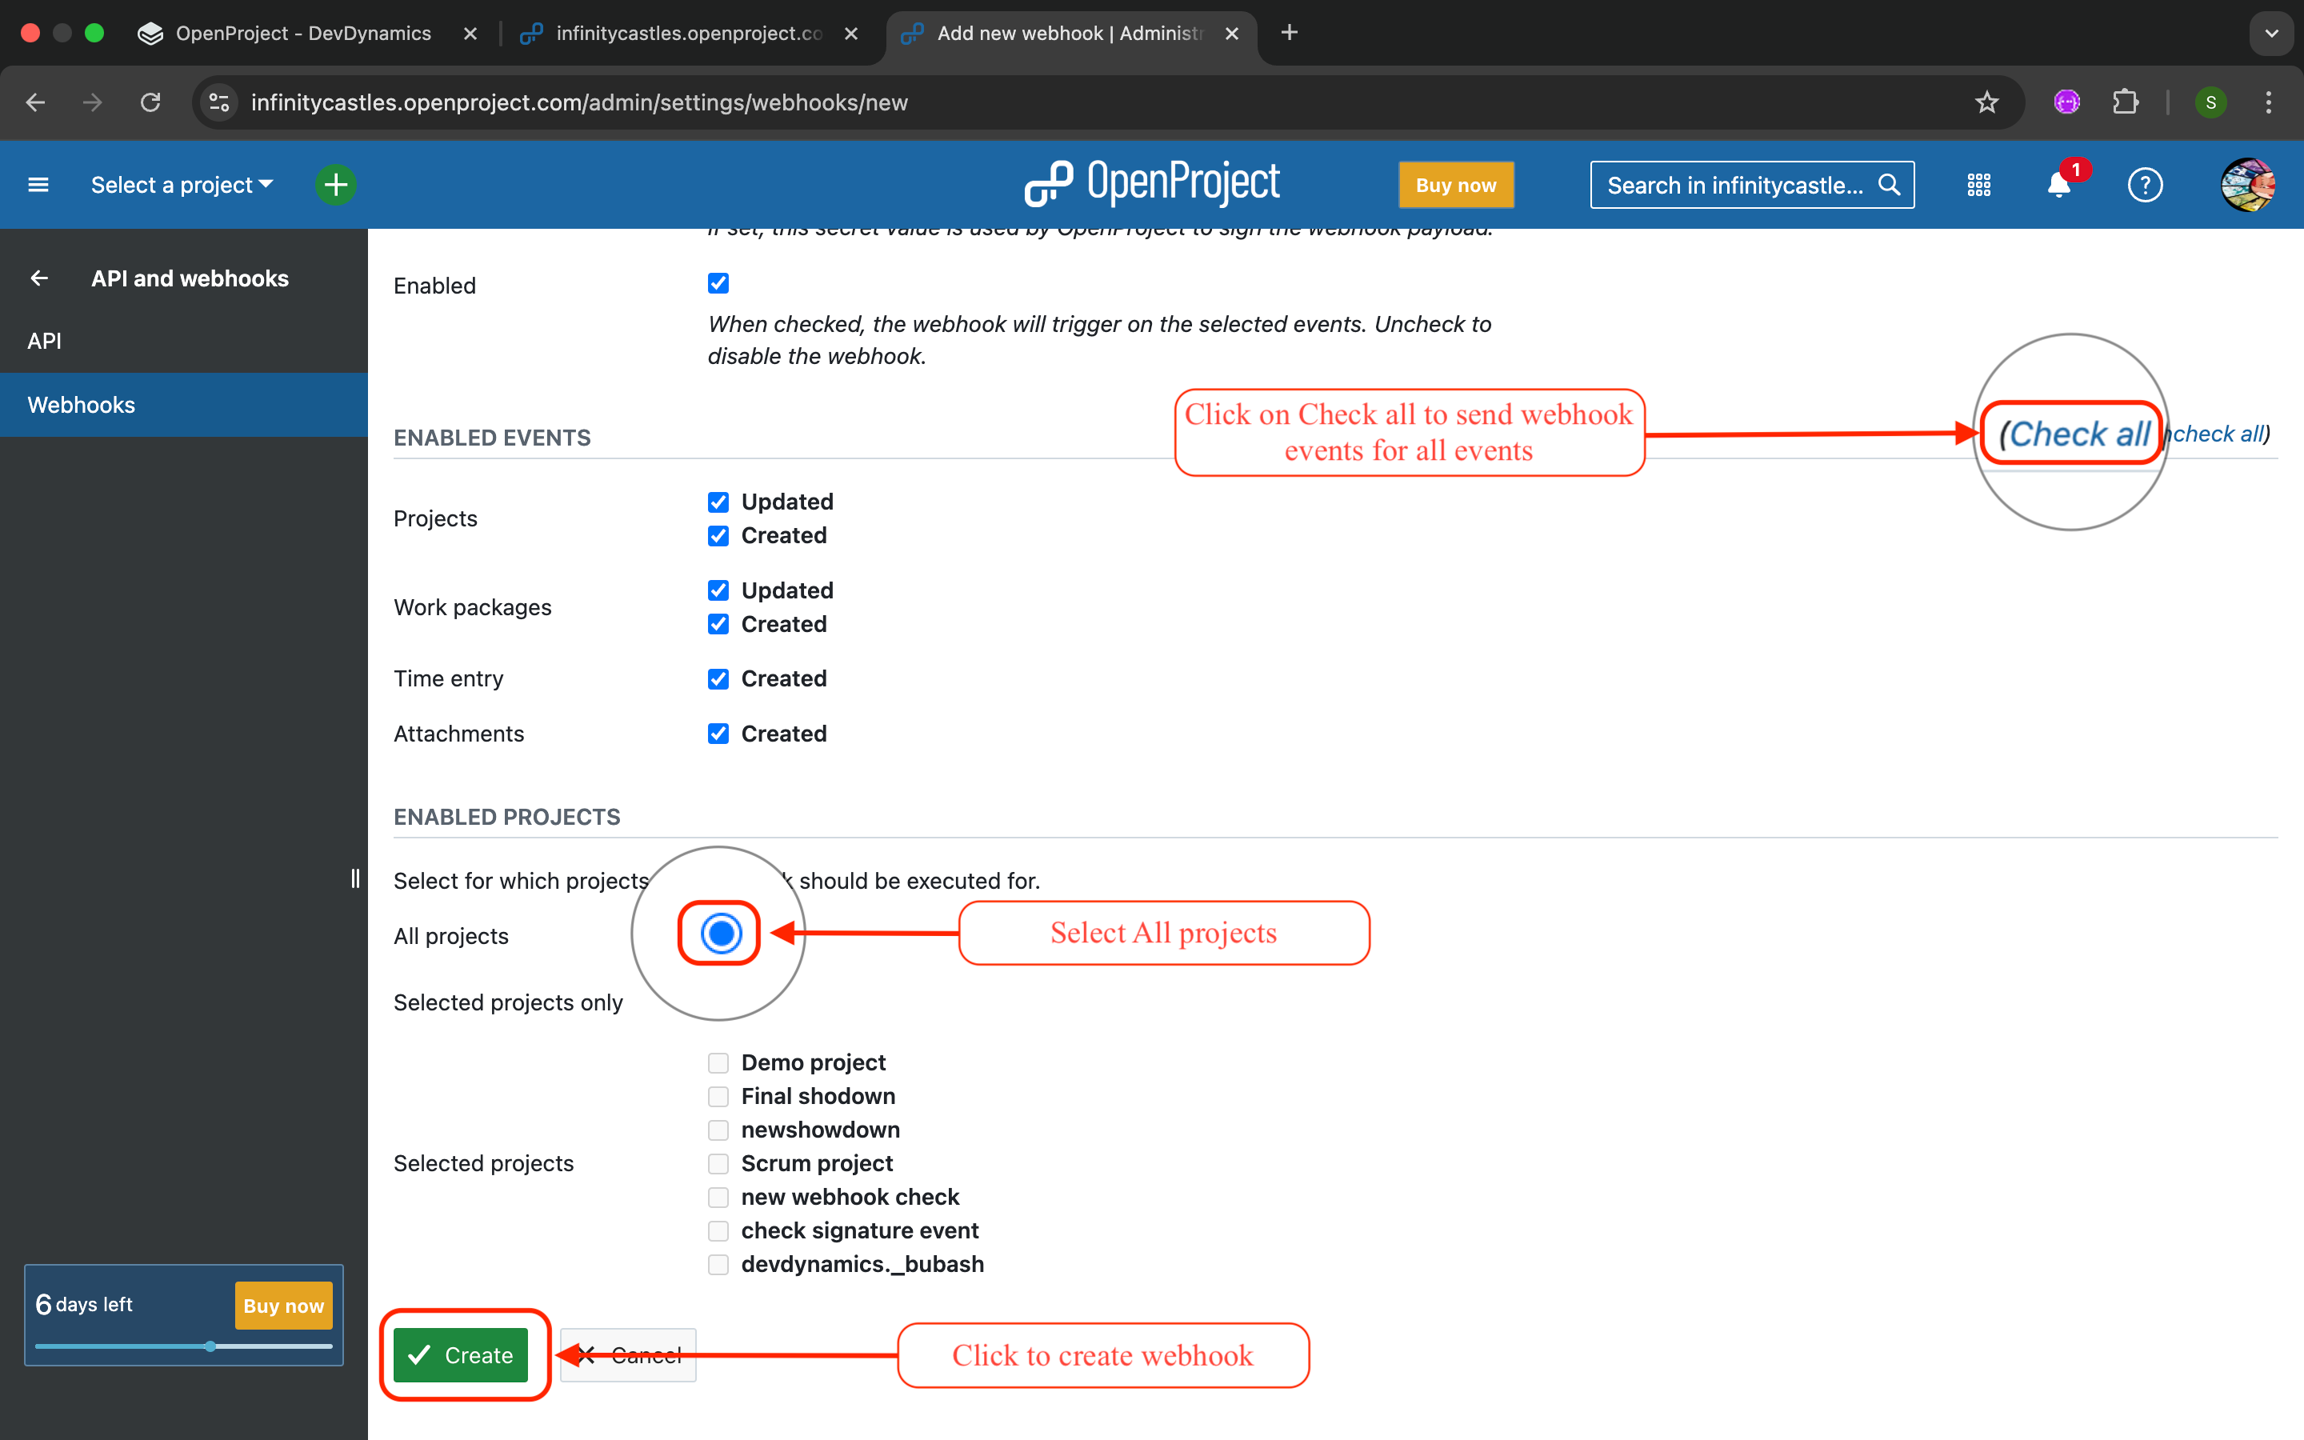
- To enable all events Click check all.
- Click Create to complete webhook creation.
It's important that you enable all events, else you might see inconsistency in DevDynamics portal.
Check necessary conditions
With these steps completed, the integration with OpenProject is successfully done!