Google Calendar
Steps to Integrate with Google Calendar
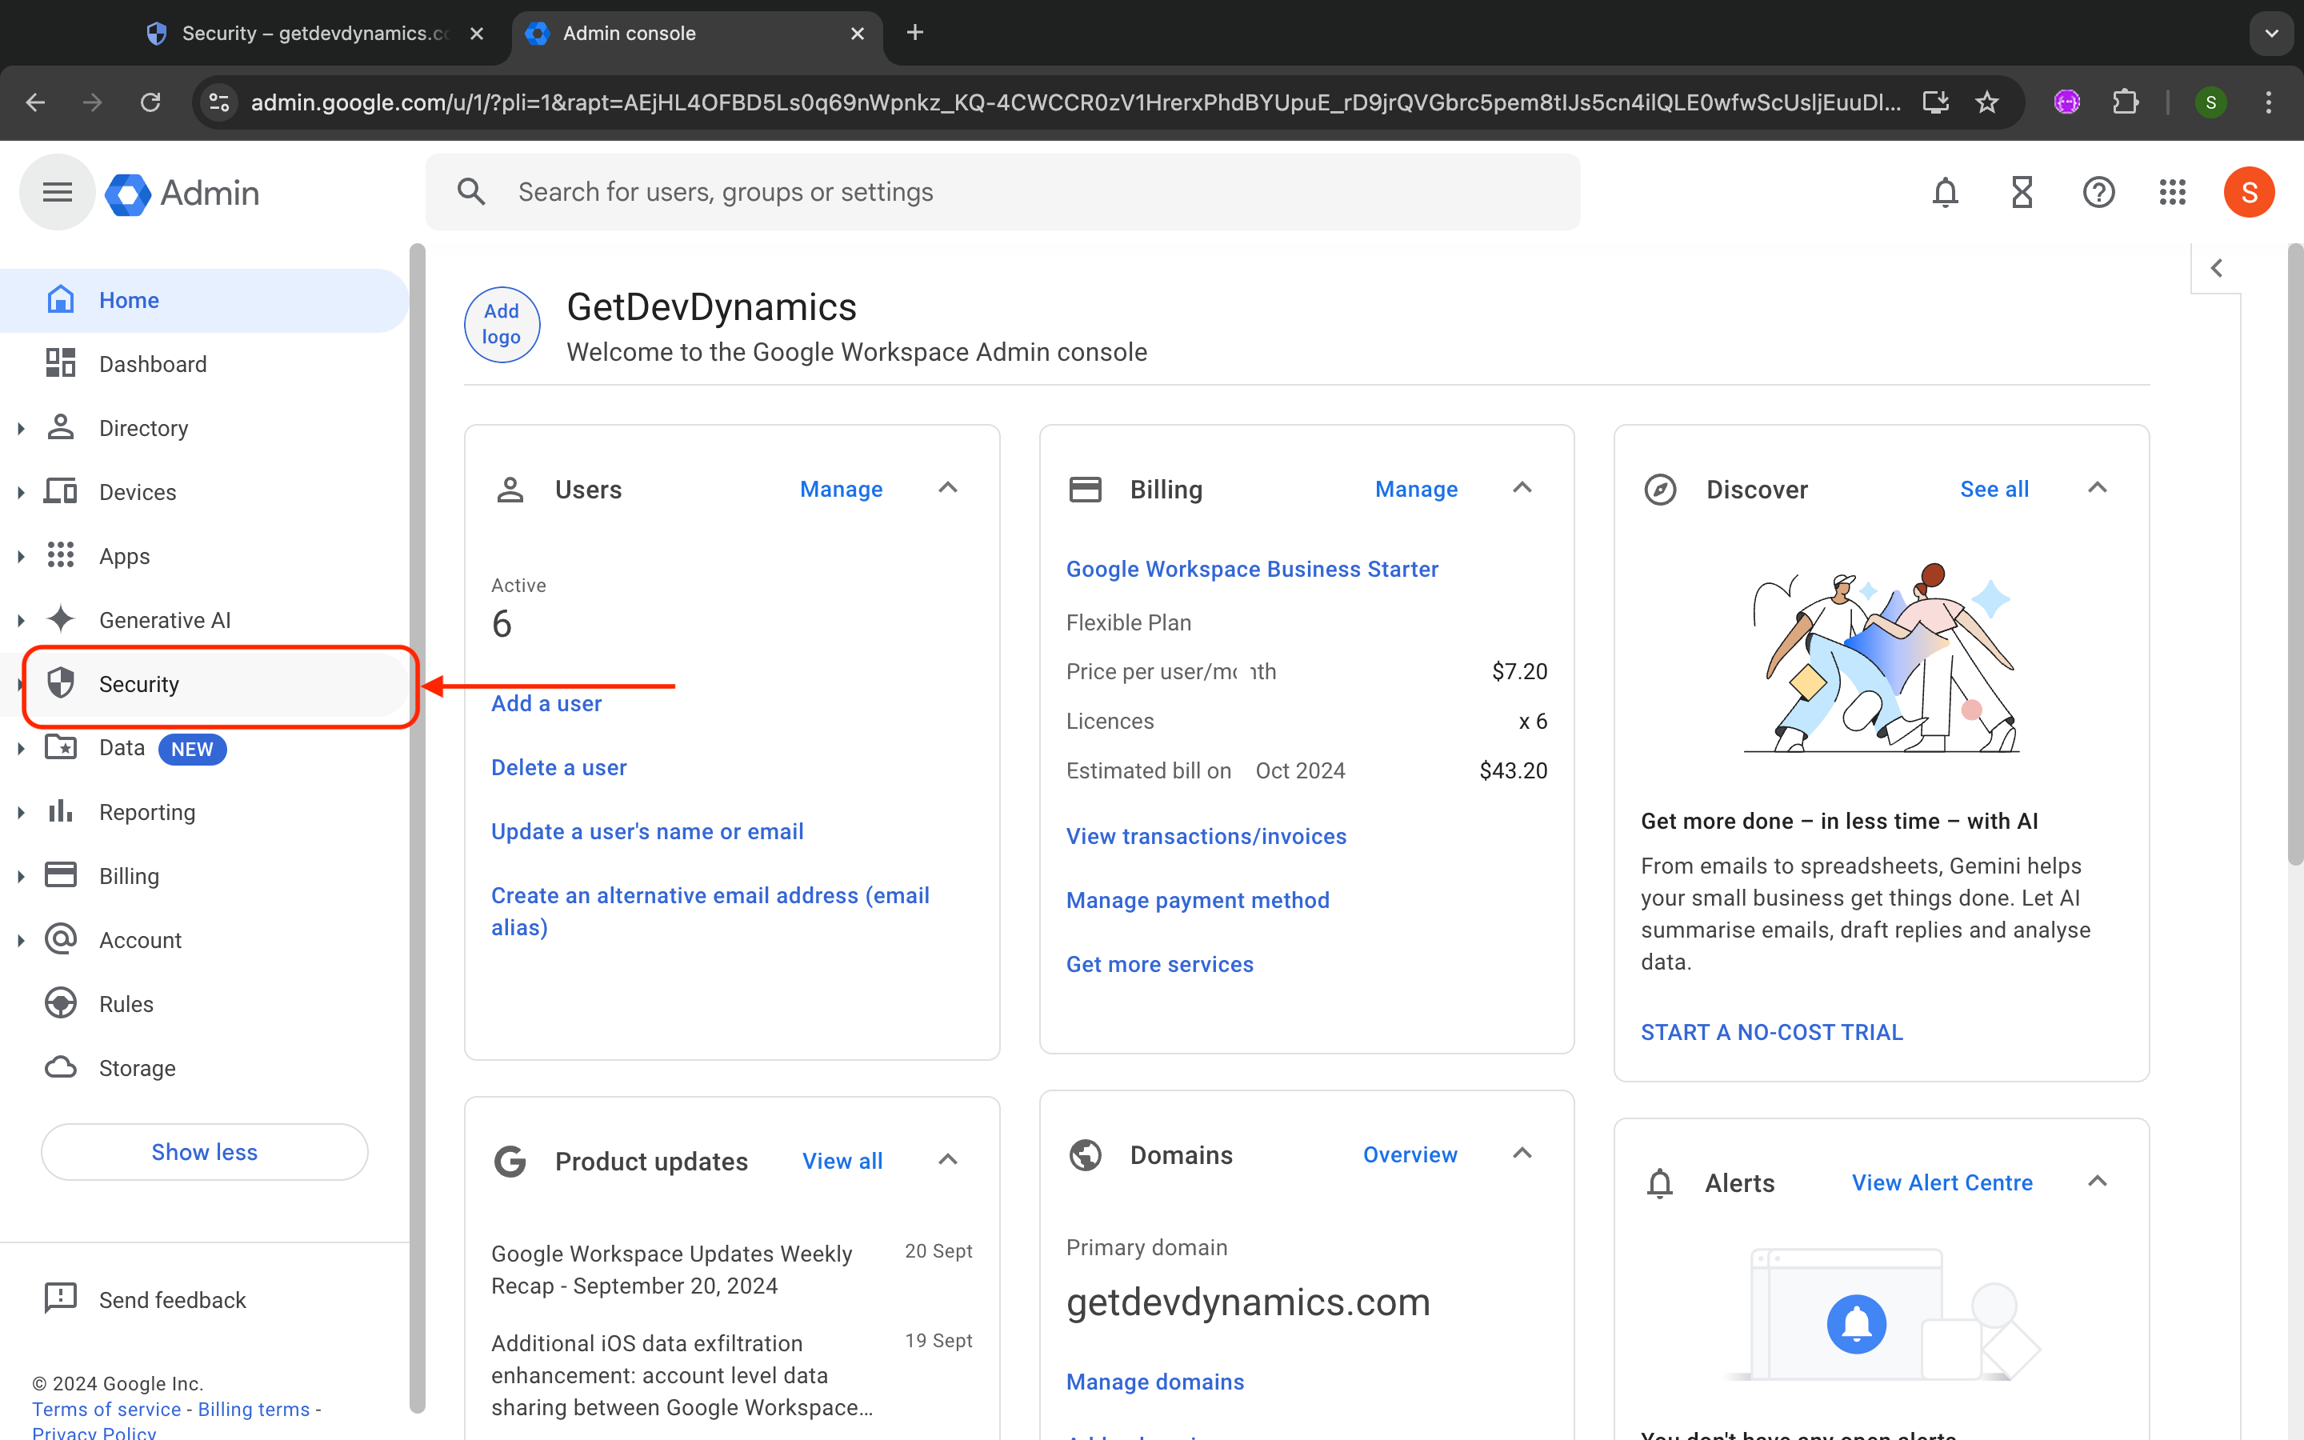
- Access the Google Admin Console: Go to your Google Workspace domain's Admin Console and select
Securityfrom the left sidebar.
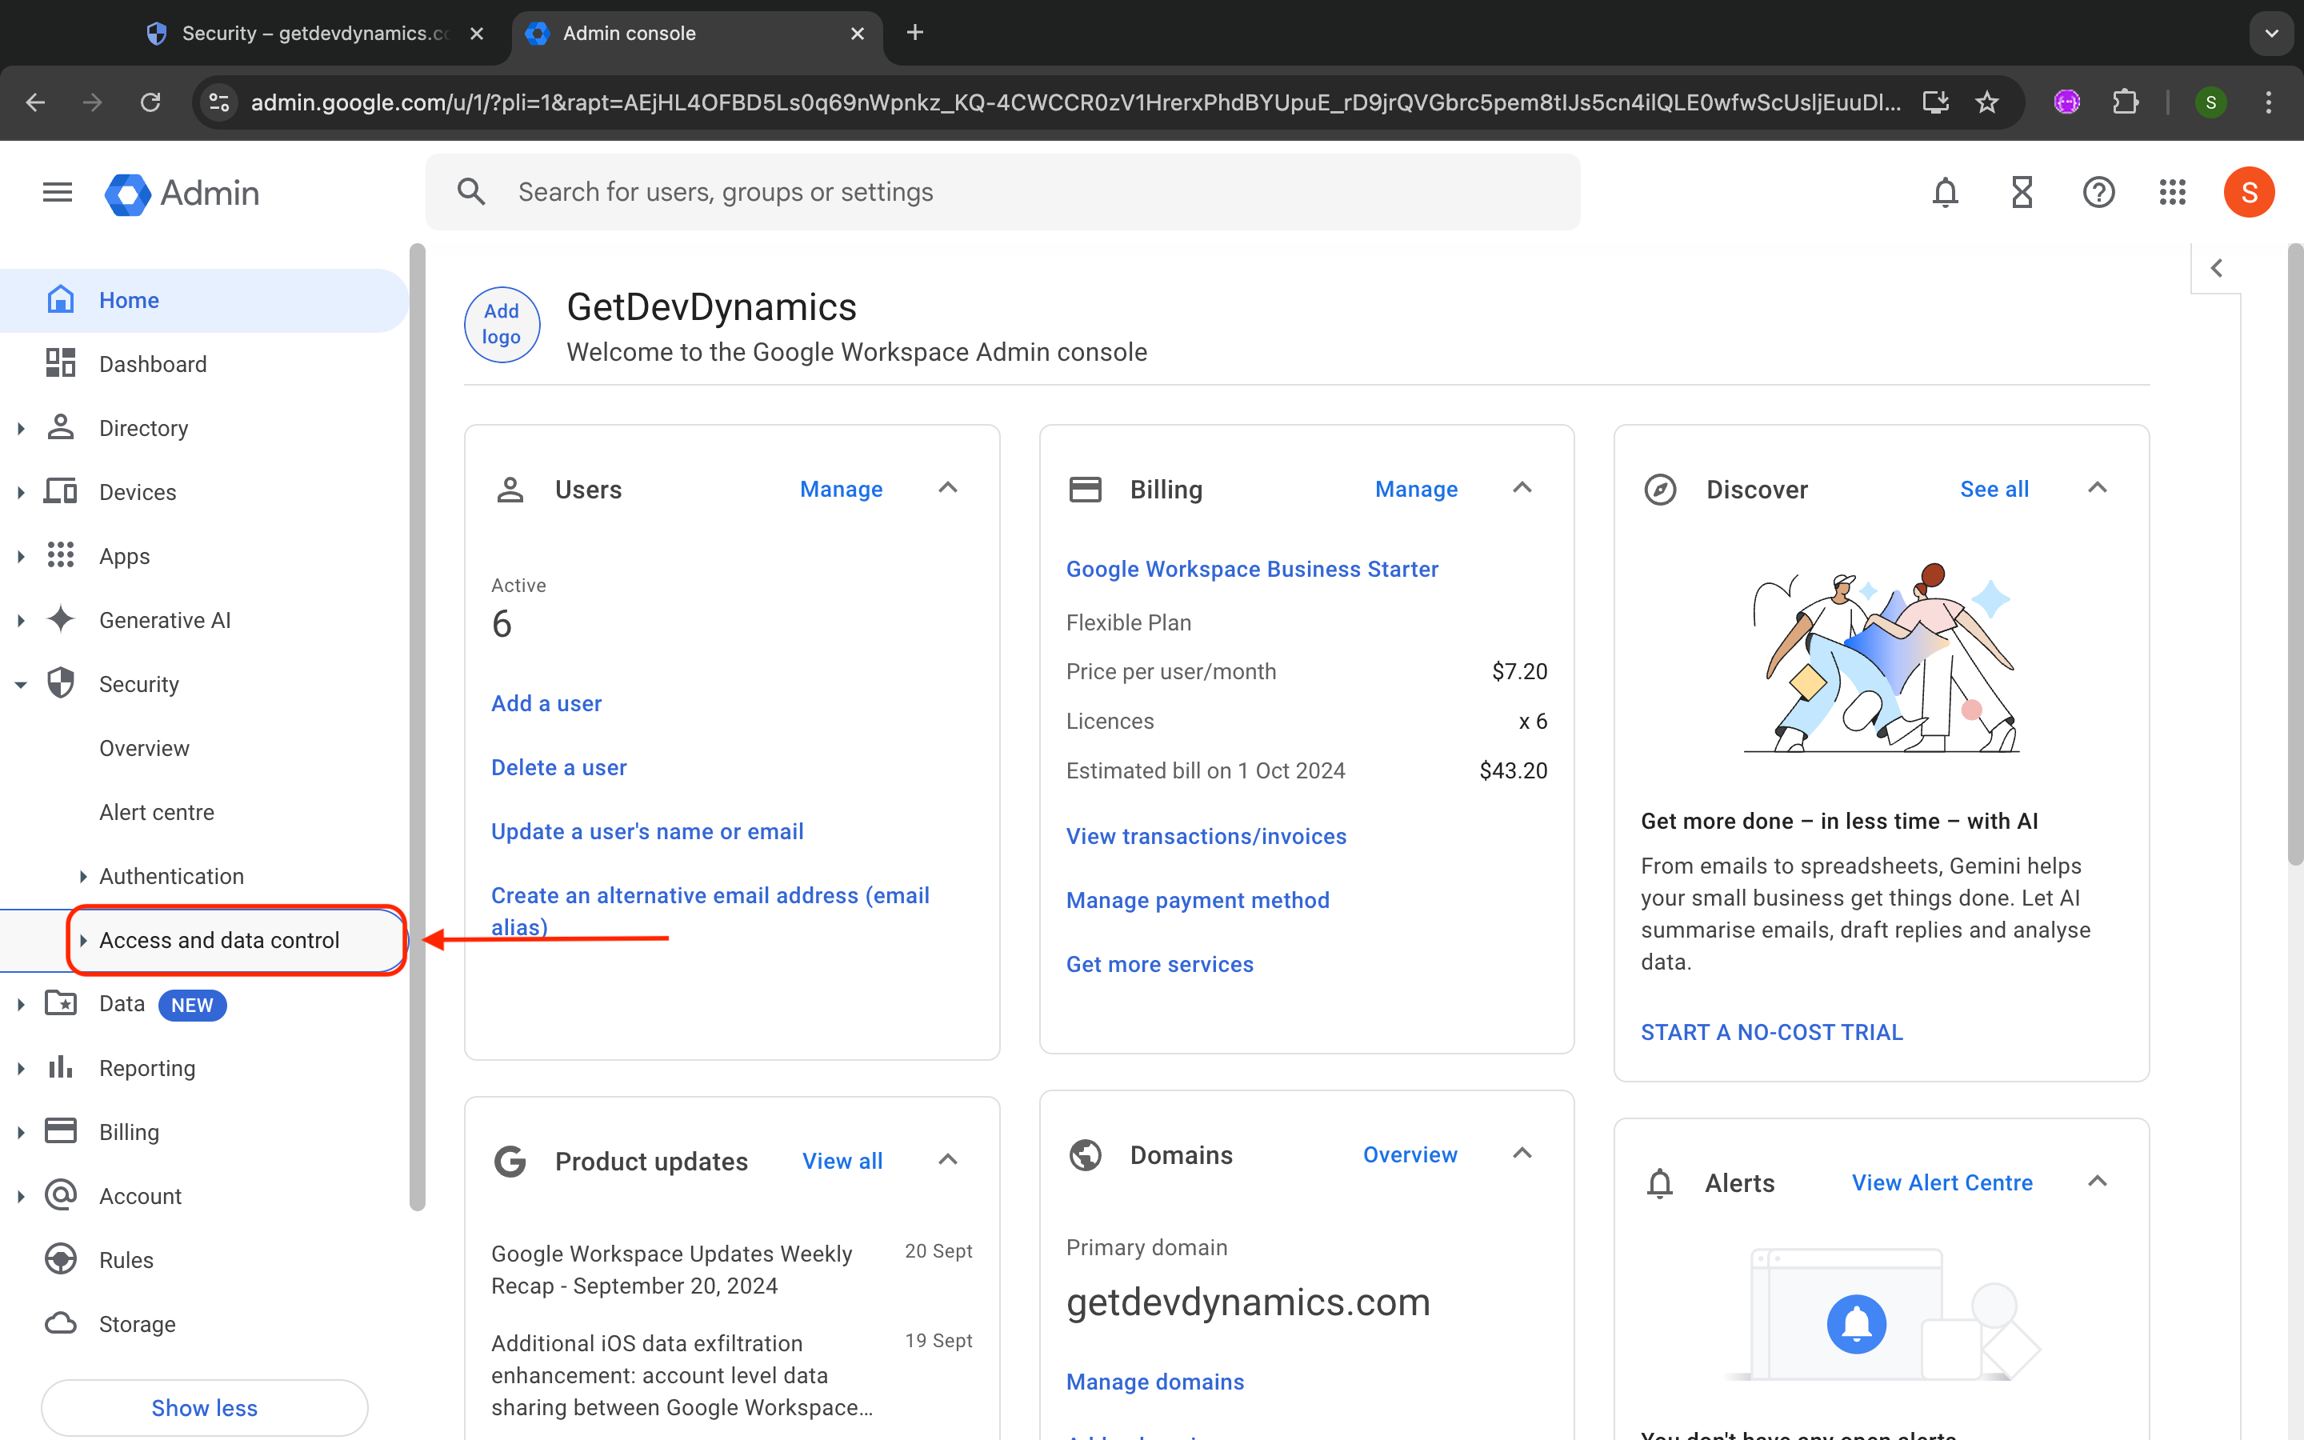
- Navigate to Access and Data Control: From the dropdown menu, select
Access and data control.
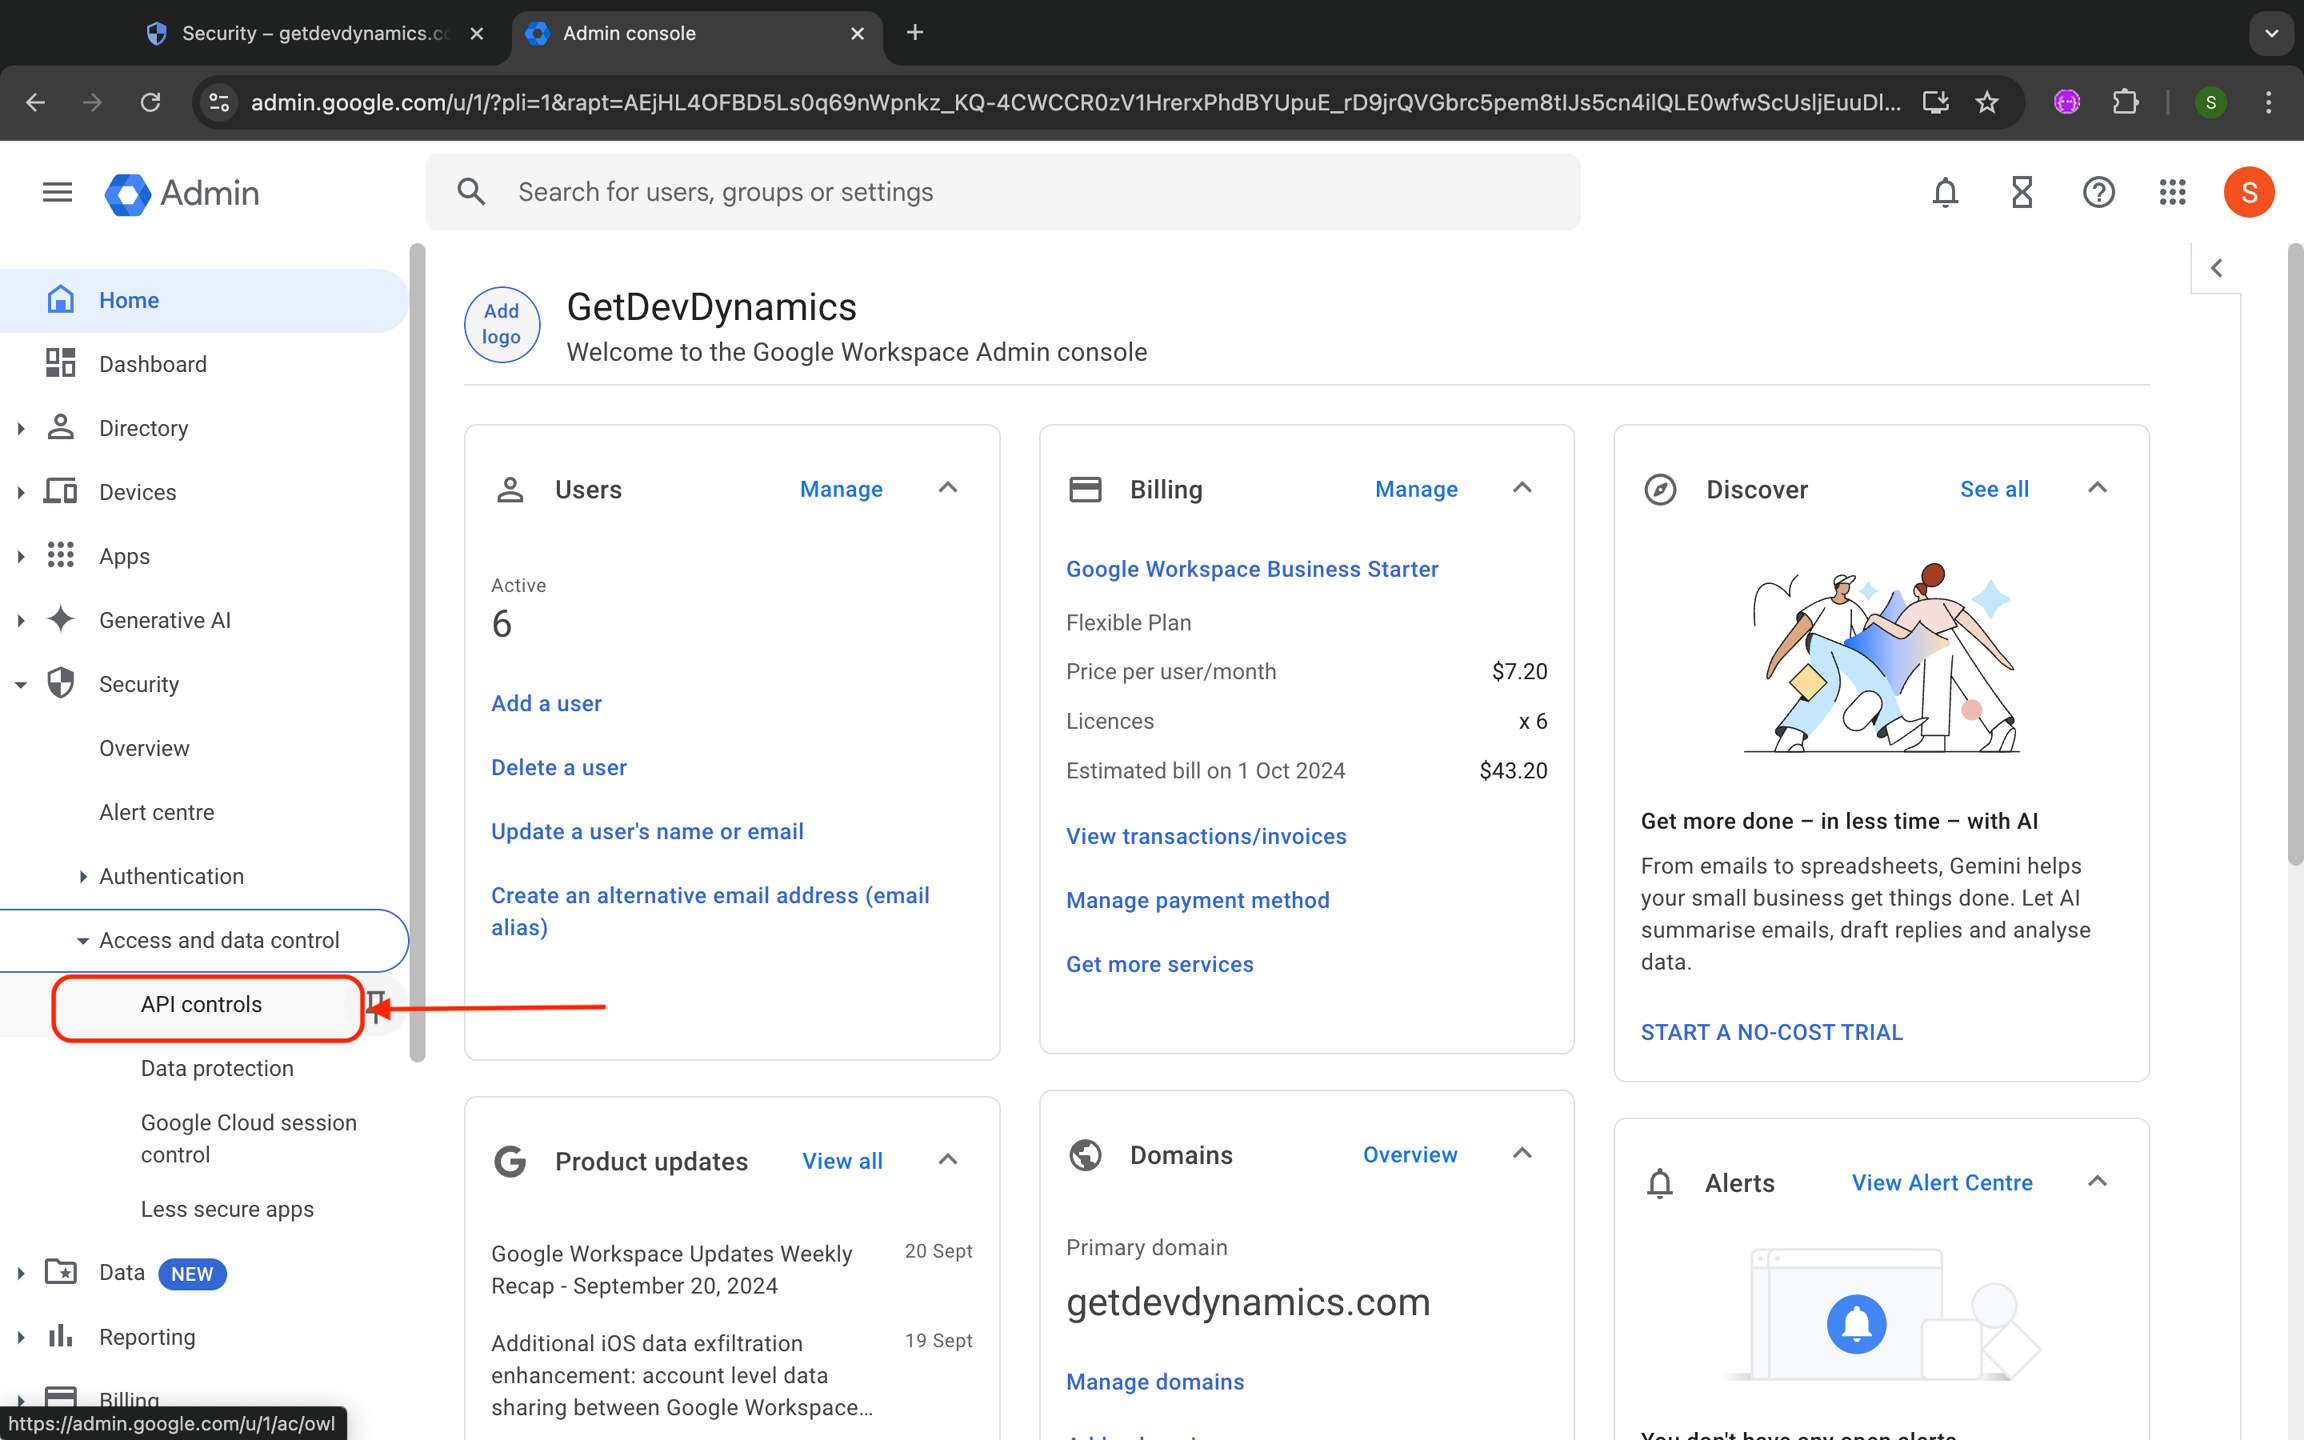
- Go to API Controls: In the next dropdown, choose
API controls.
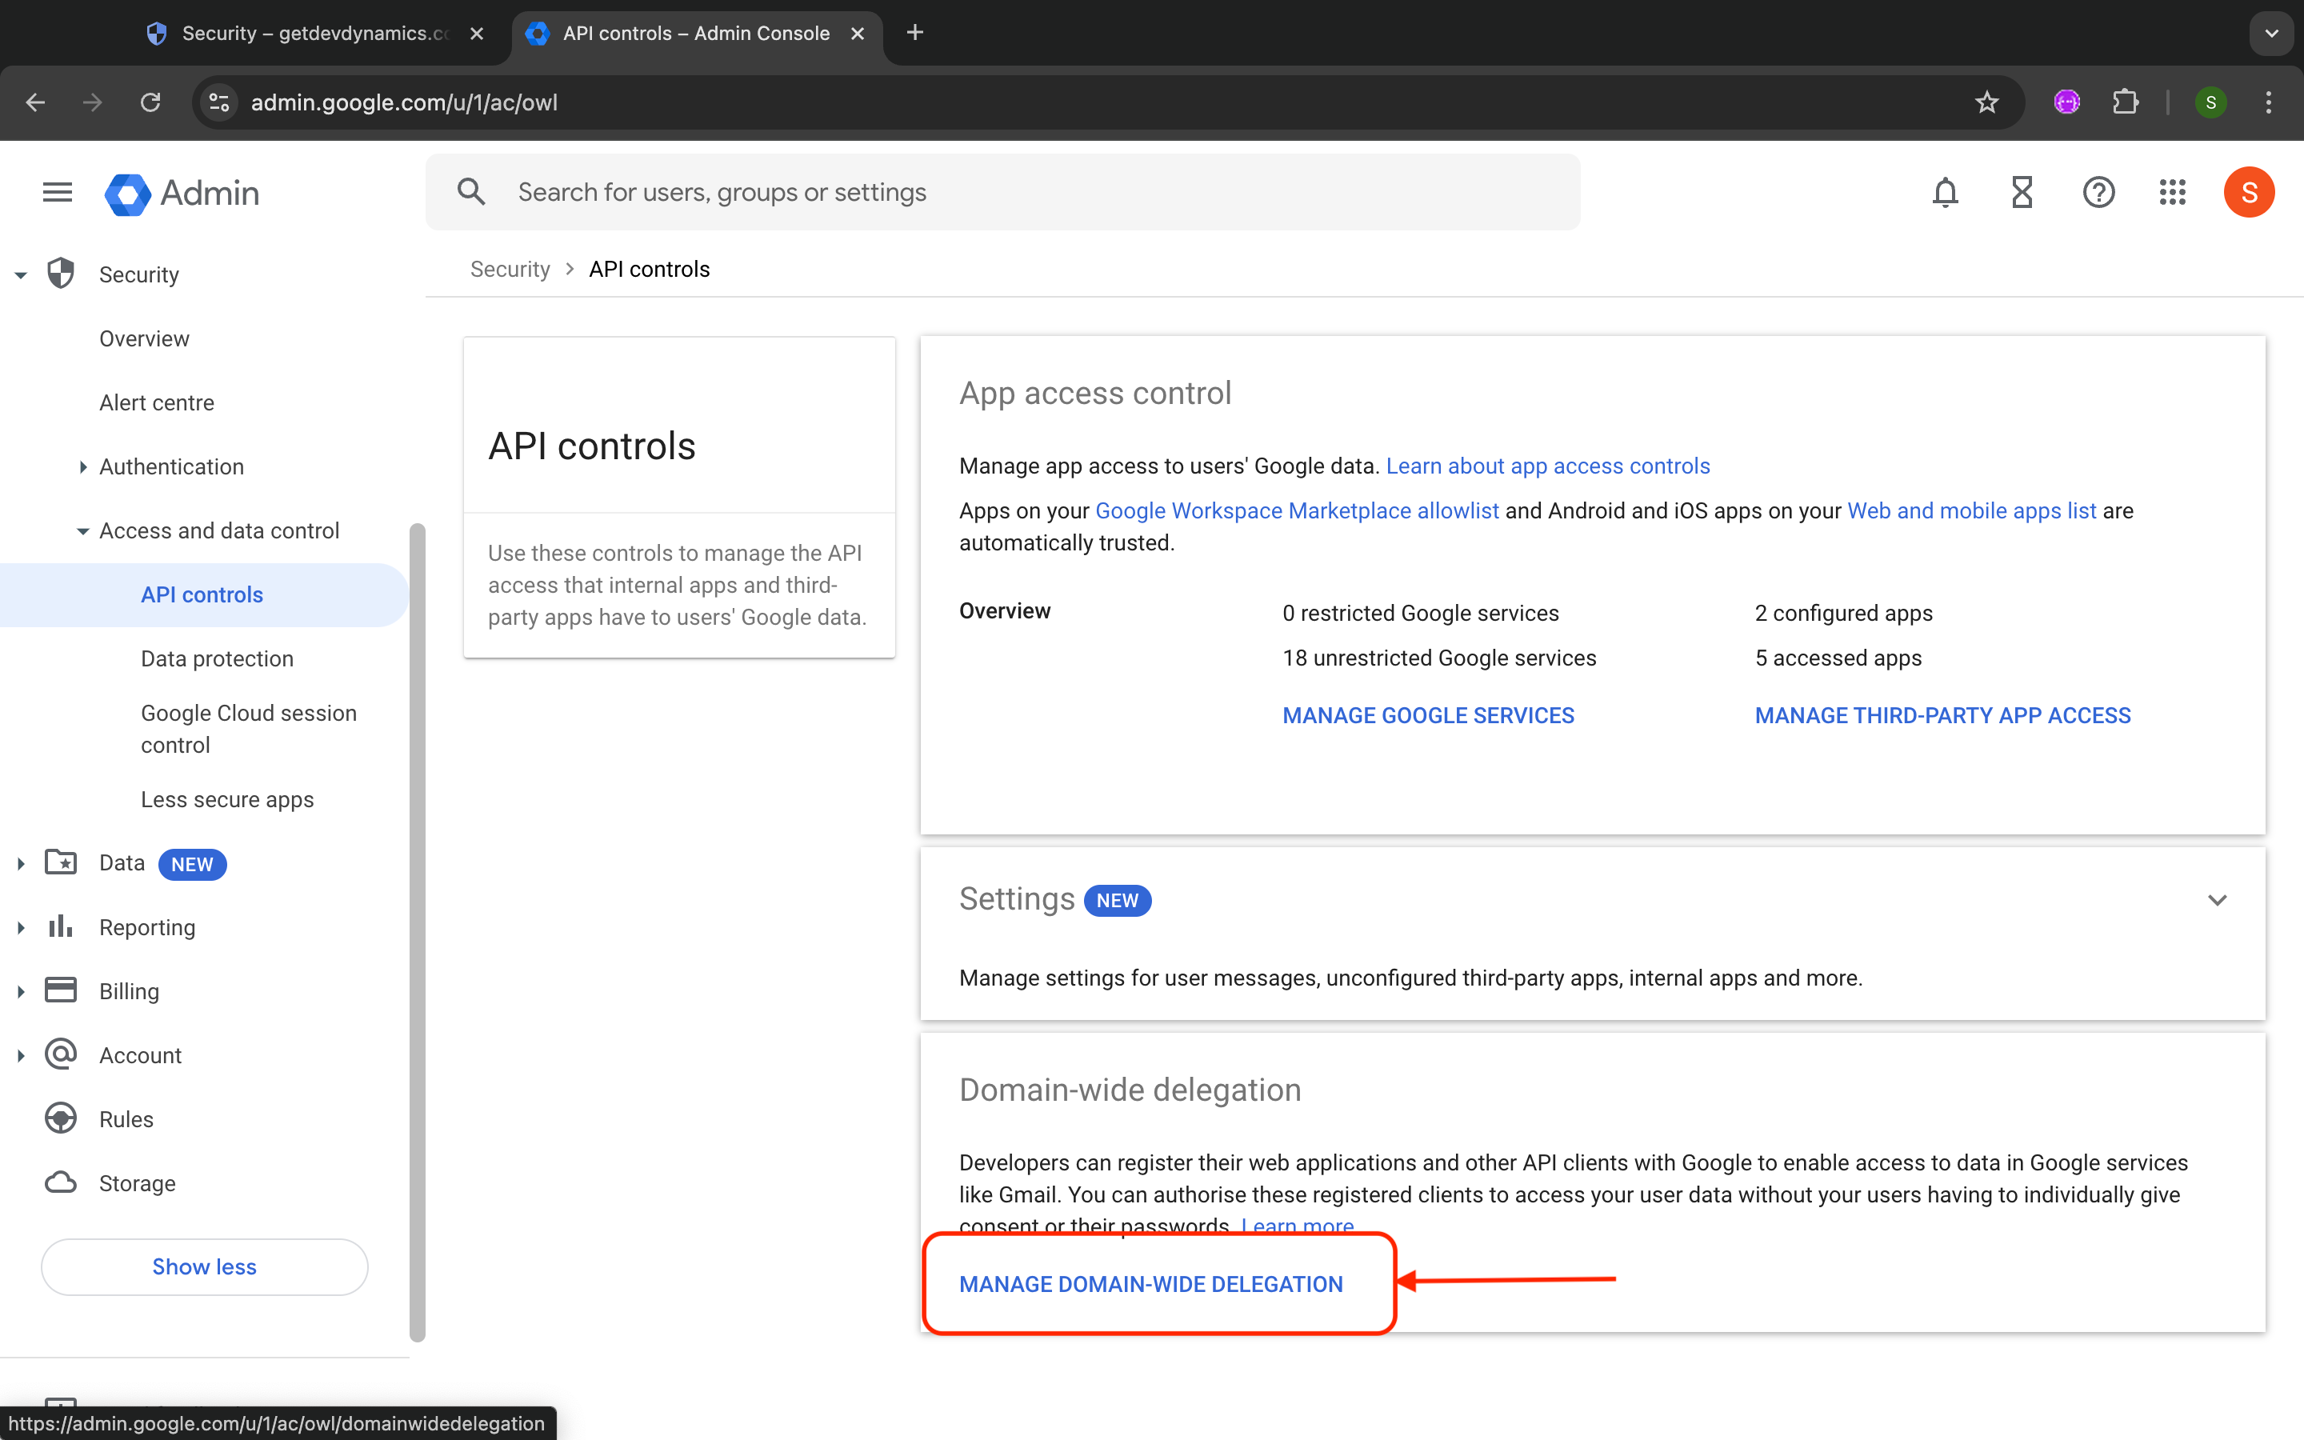
- Manage Domain-Wide Delegation: Under the "Domain-wide delegation" section, click on
MANAGE DOMAIN-WIDE DELEGATION.
-
Add a New Client: Click on
Add New. -
Enter Client ID and OAuth Scopes:
Get the
Client IdandOAuth Scopesfrom description or the integrate popup of DevDynamics Google Calendar integration page.- In the
Client IDfield, paste the provided Client ID. - In the
OAuth Scopesfield, paste the provided scopes.
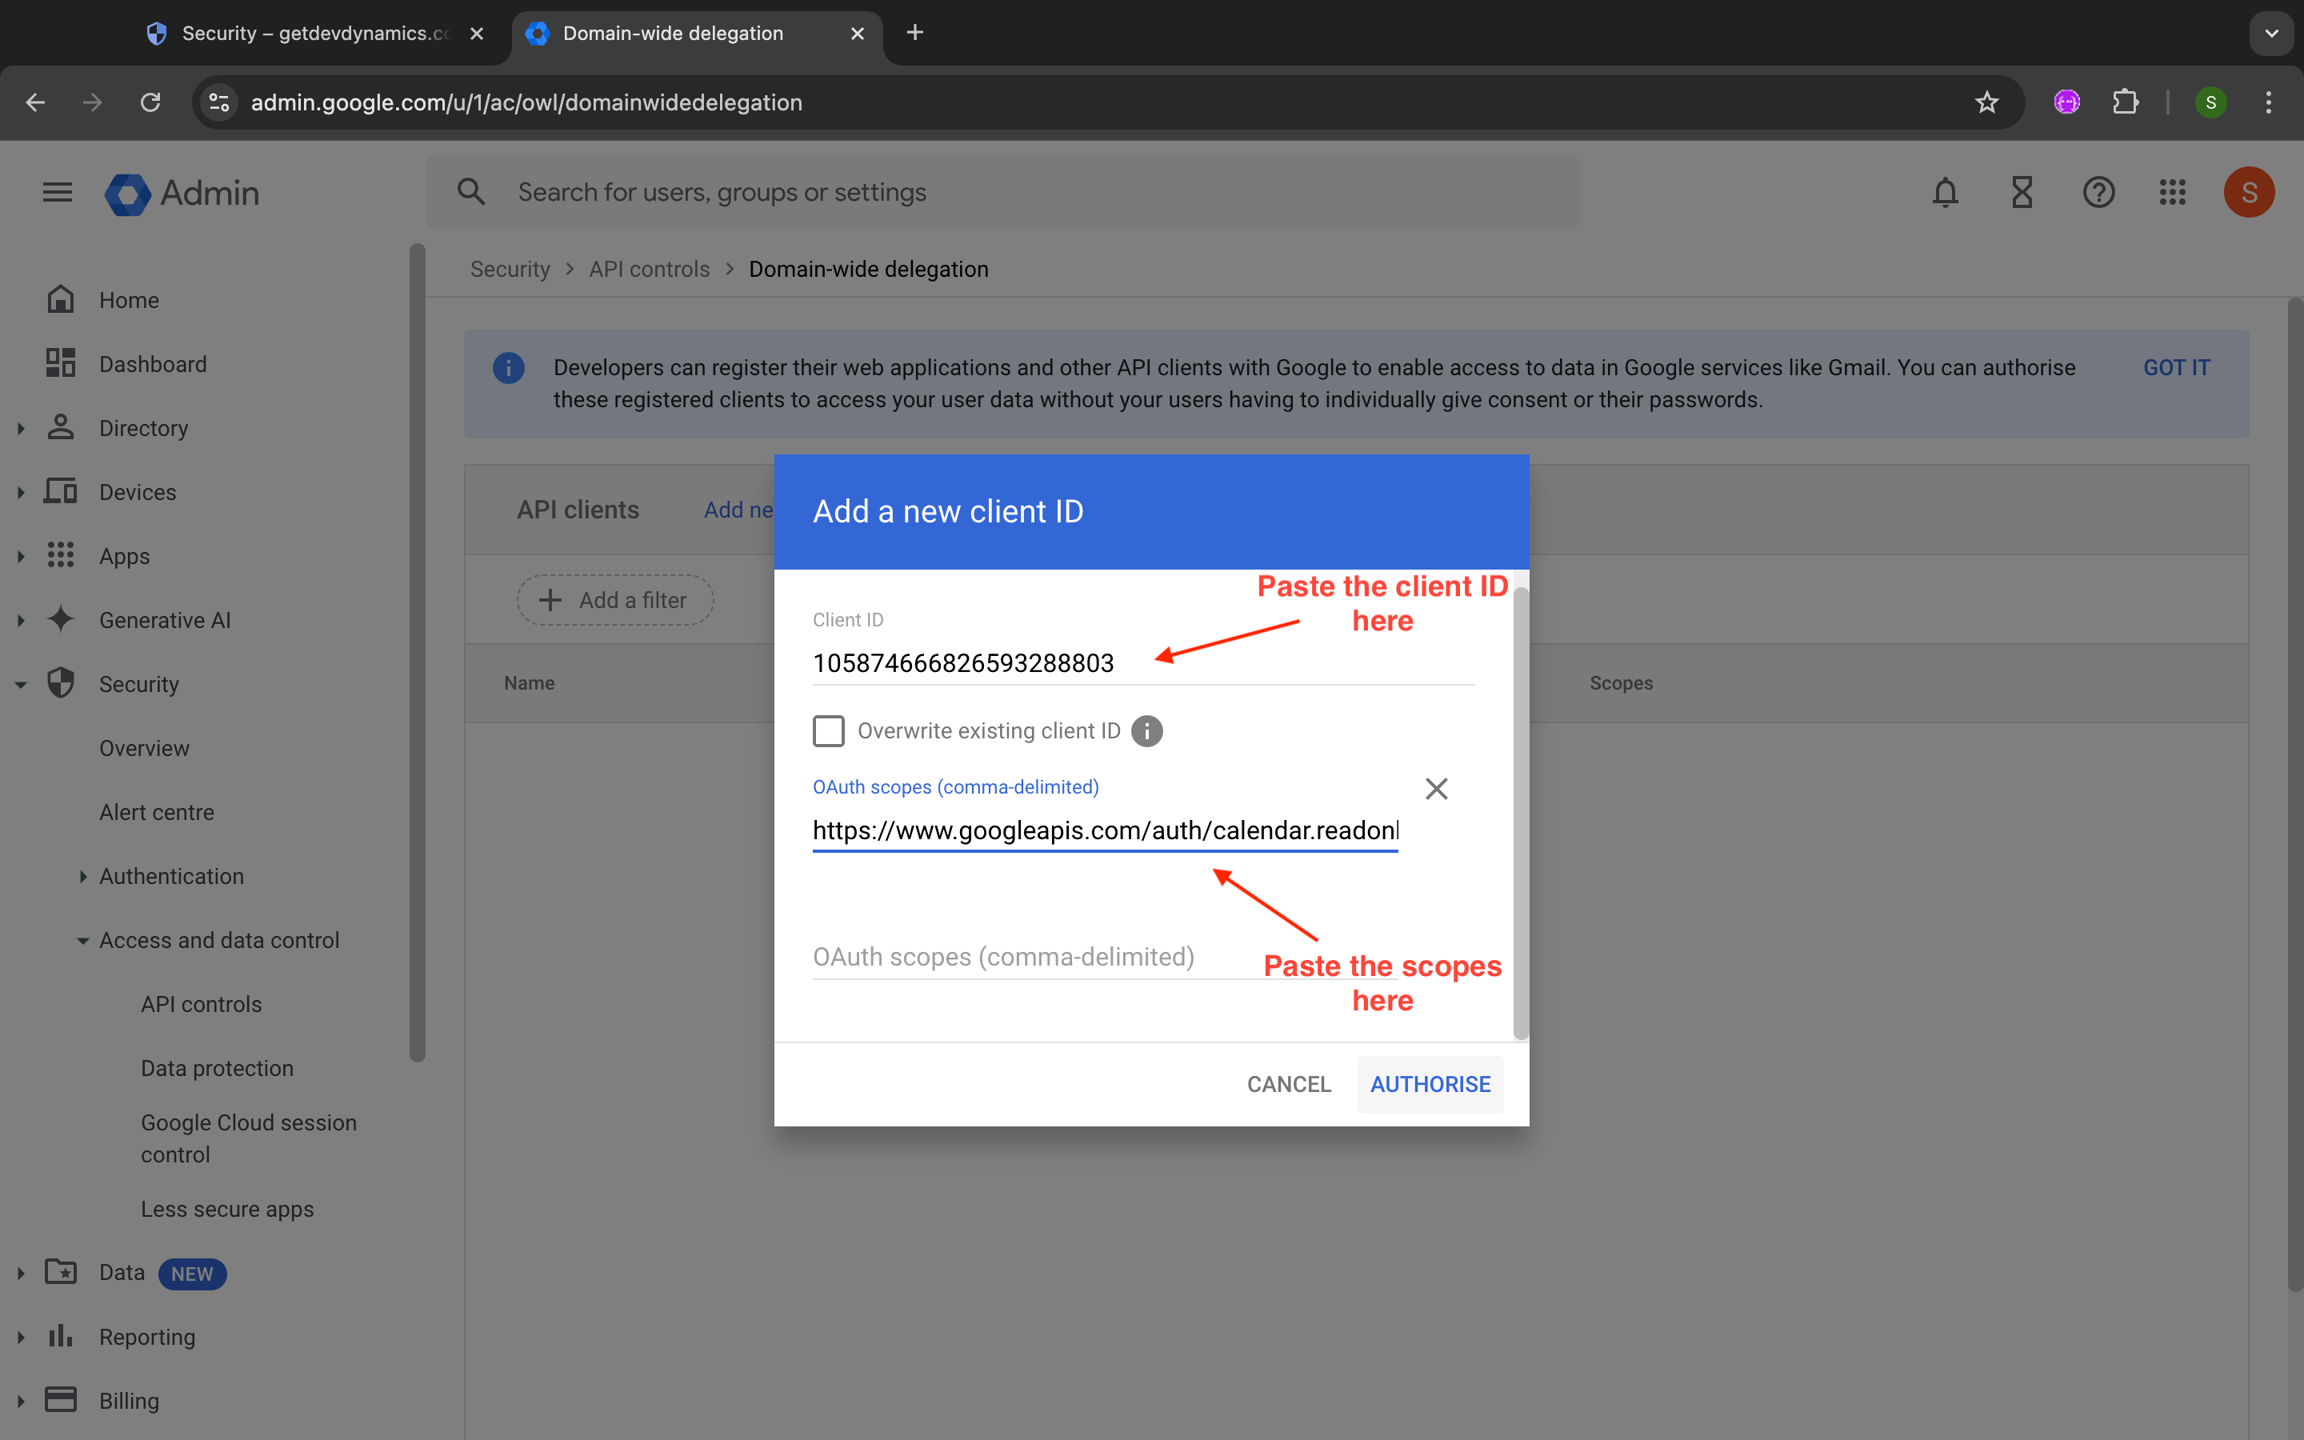
- In the
-
Authorize the Client: After entering the details, click on
Authorize. -
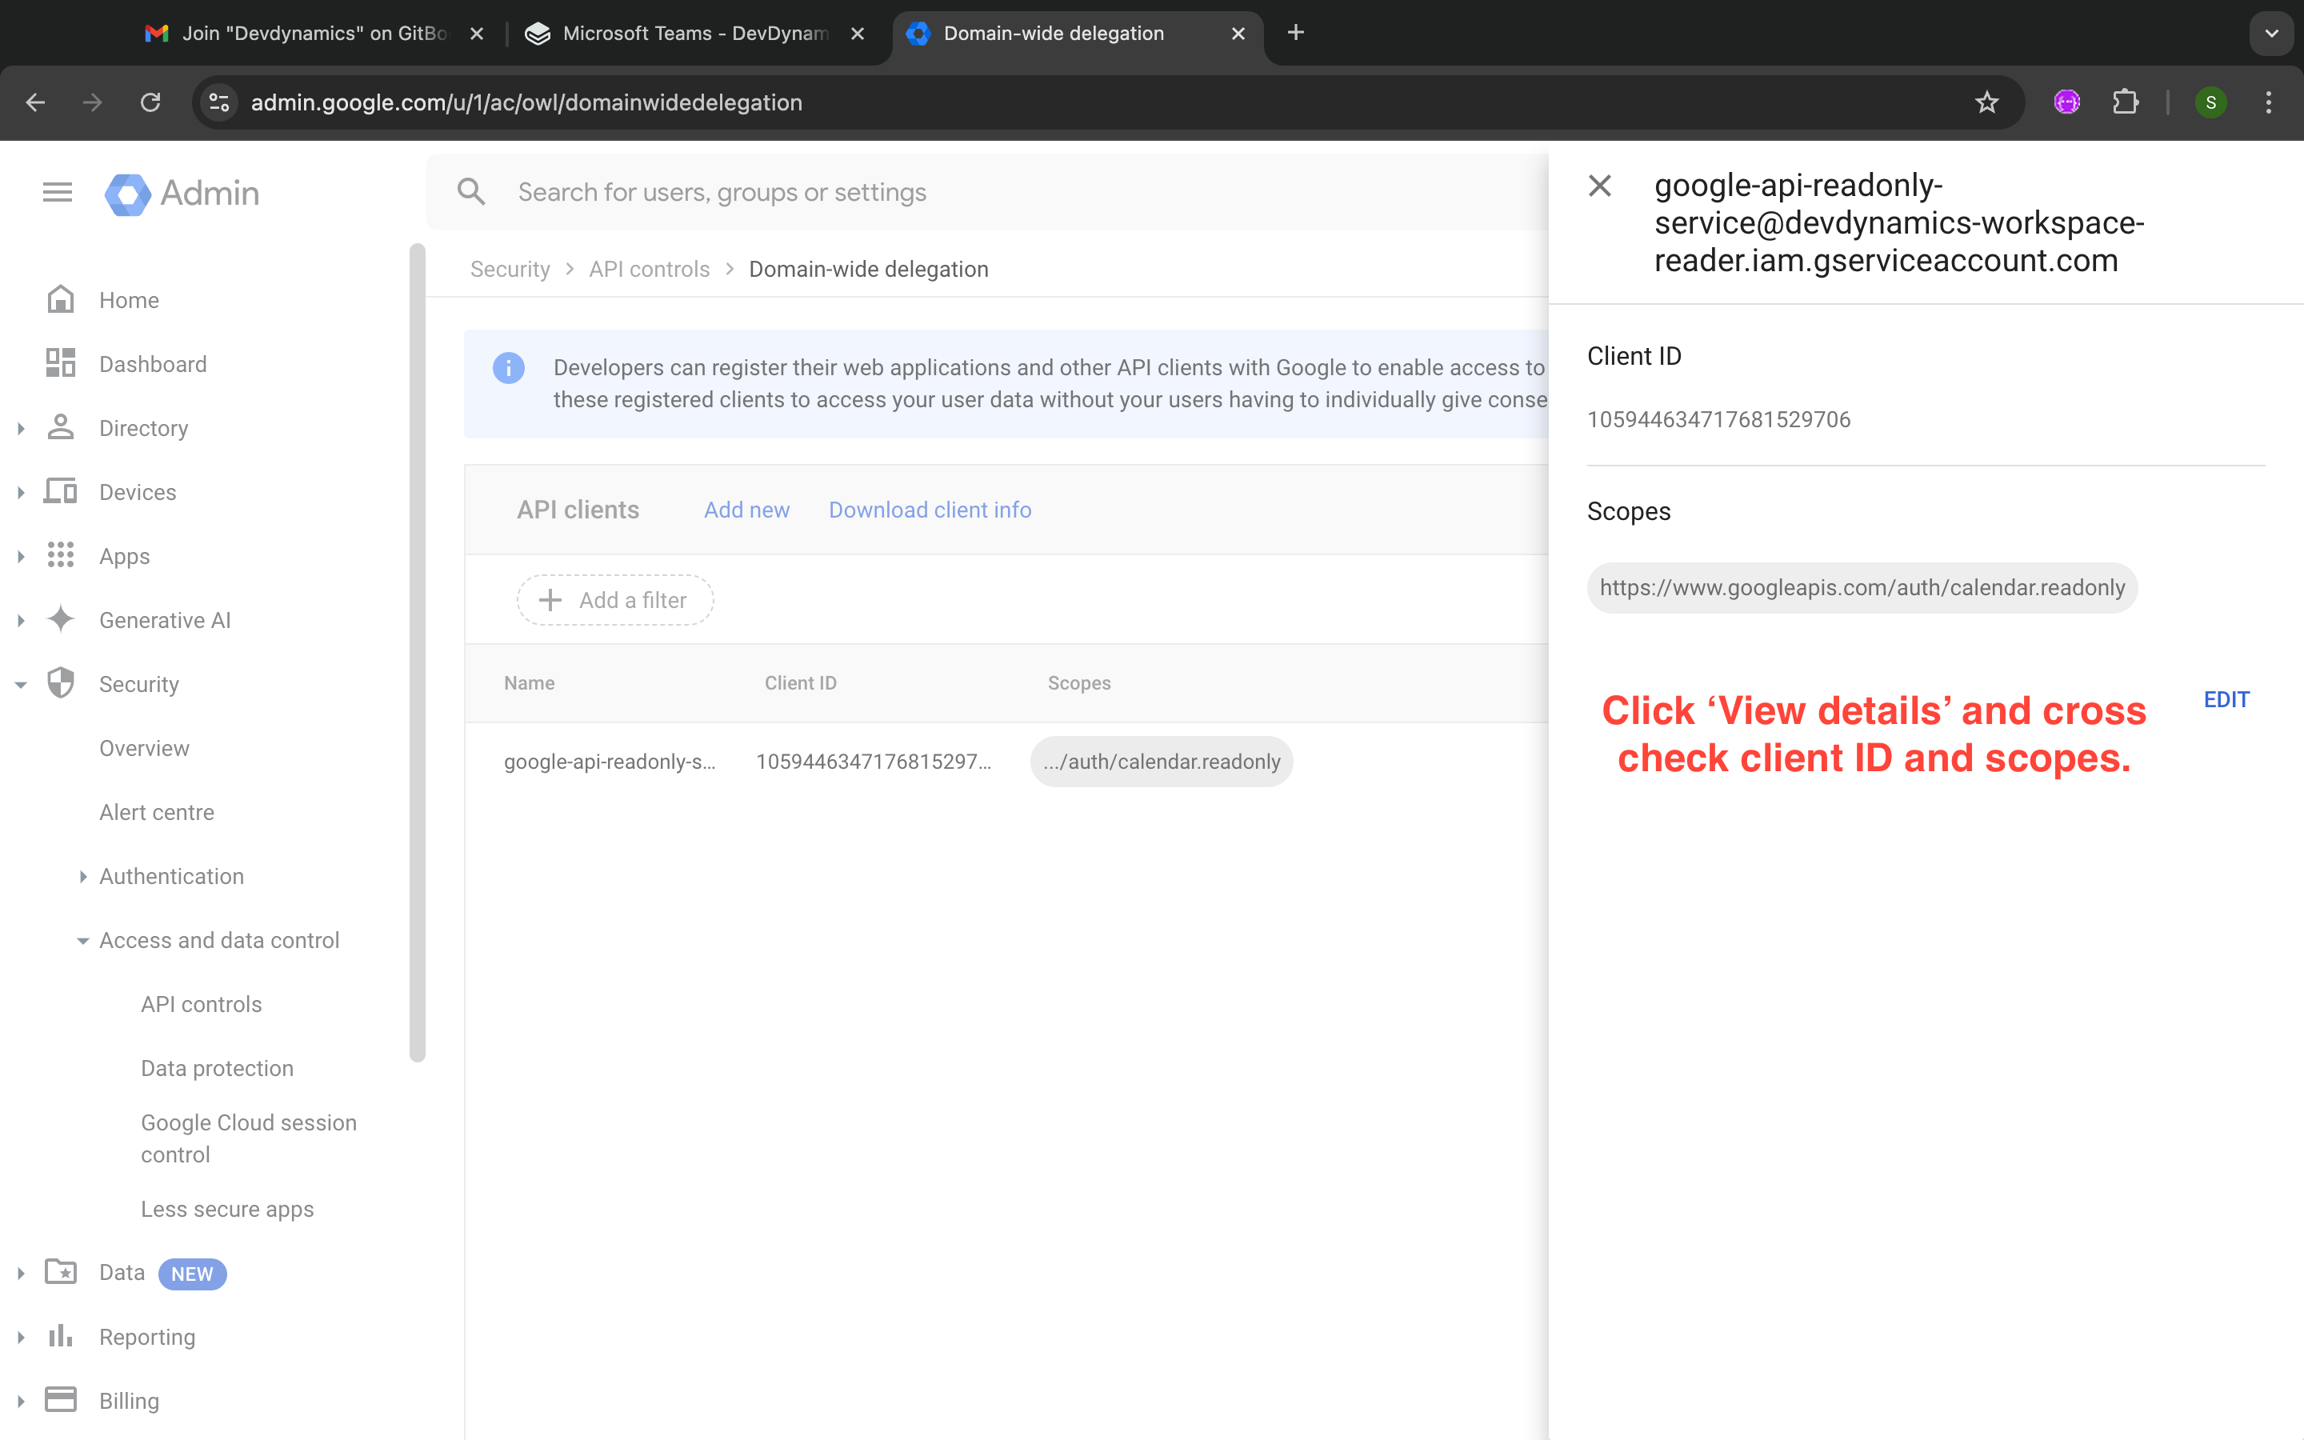
Confirm Client ID and Scopes: Once authorized, click on
View detailsto double check whether clientId and scopes match with those provided.
This completes the integration with Google Calendar.