DevDynamics Onboarding Guide
What is DevDynamics?
DevDynamics is an engineering analytics platform. It connects to your Git host (GitHub, GitLab, Azure Repos, Bitbucket) and issue tracker (Jira, Linear, Azure Boards, ClickUp) and turns their metadata into clear insights: code‑review health, cycle time, bottlenecks, and DORA metrics. DevDynamics never reads your source code—only metadata.
Before you begin
- Have access to your work email inbox.
- Be signed into your Git provider (e.g., GitHub) in the same browser.
- If you are evaluating in a company org, make sure an org owner/admin is available to approve app installations.
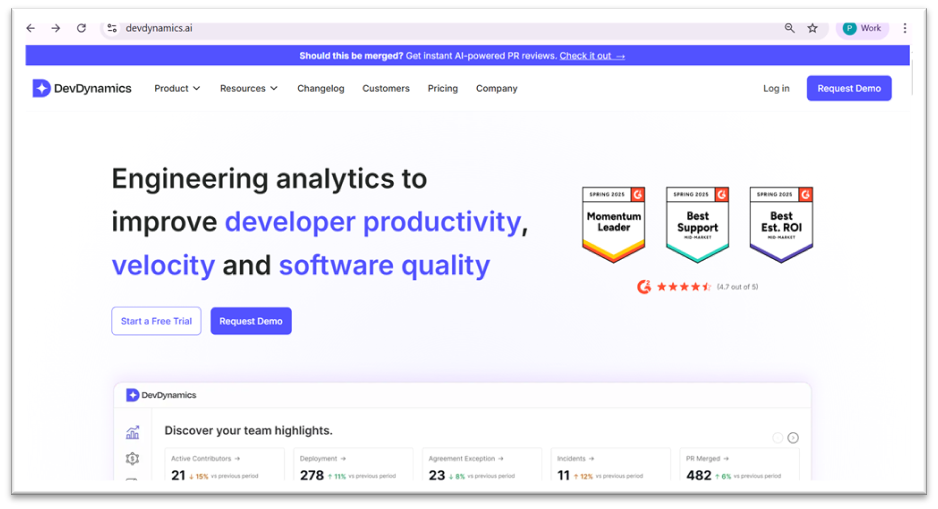
Step 1 — Open the website and start your free trial
- Go to https://devdynamics.ai in your browser.
- On the homepage, click Start a Free Trial (top left under the hero section).
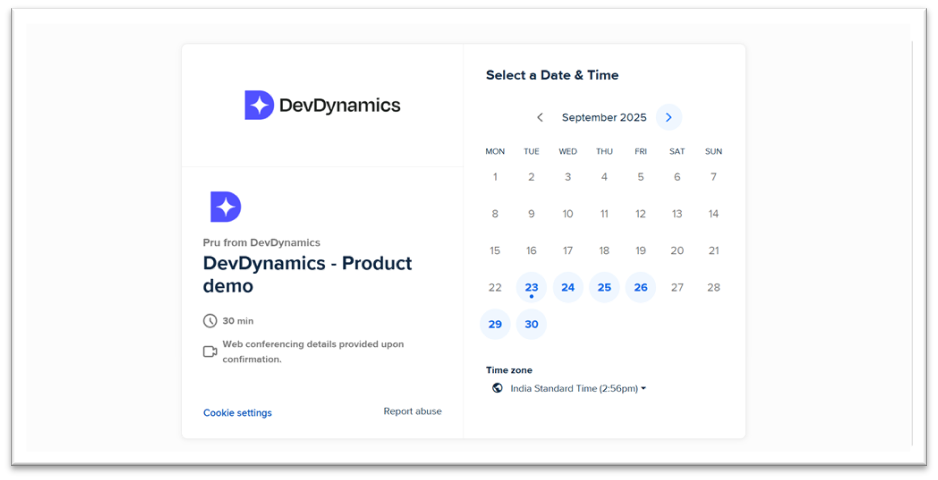
- Prefer a walkthrough? Click Request Demo instead and pick a date/time.
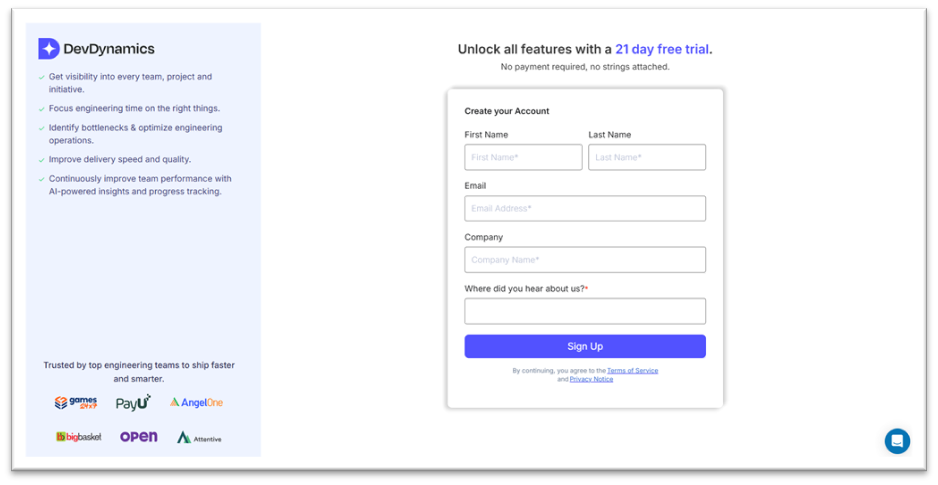
Step 2 — Create your account (sign‑up form)
- Fill each field exactly as shown on the right: First name, Last name, Email, Company, and Where did you hear about us?.
- Use your company email if possible. This improves automatic account matching later.
- Click Sign Up. If you already have an account, click Log in on the top right of the homepage.
Common pitfalls & fixes:
• No Sign Up button? Scroll down—some browsers zoom the page.
• Company name is optional but recommended (helps with team setup).
• Using a personal email? You can, but contributor matching works best with your work domain.
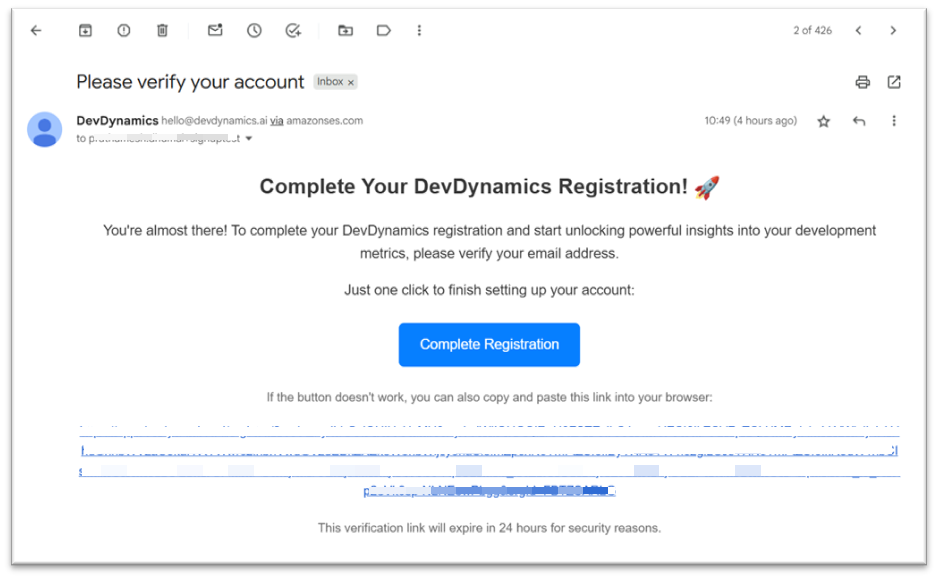
Step 3 — Verify your email
- Open your inbox and find an email titled Please verify your account from hello@devdynamics.ai.
- Click Complete Registration. This confirms you own the email and activates your trial.
- If you cannot click the button, copy the long link below it into your browser address bar.
- Links expire after 24 hours. If expired, revisit the sign‑up page and register again with the same email.
If you do not receive the email within 2–3 minutes:
• Check Spam/Junk and corporate quarantine filters.
• Ask IT to allowlist devdynamics.ai and amazonses.com senders.
• Retry sign‑up—typos in the email are the most common cause.
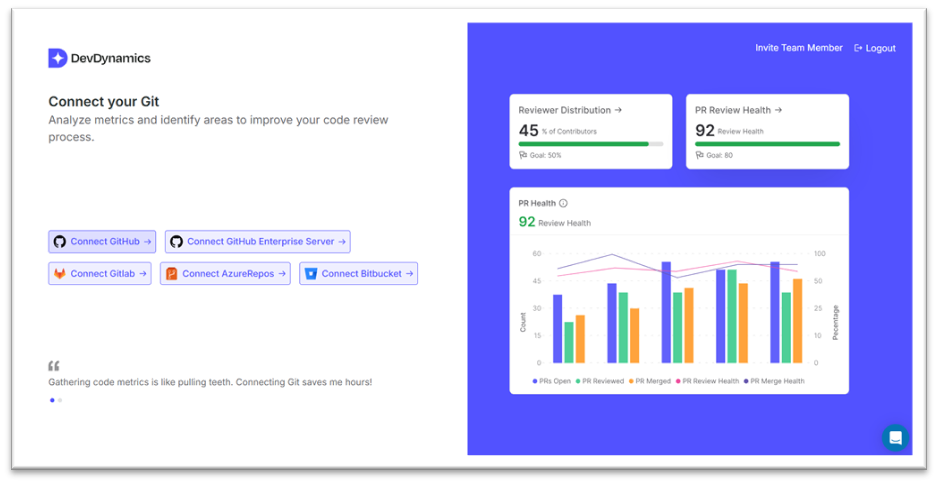
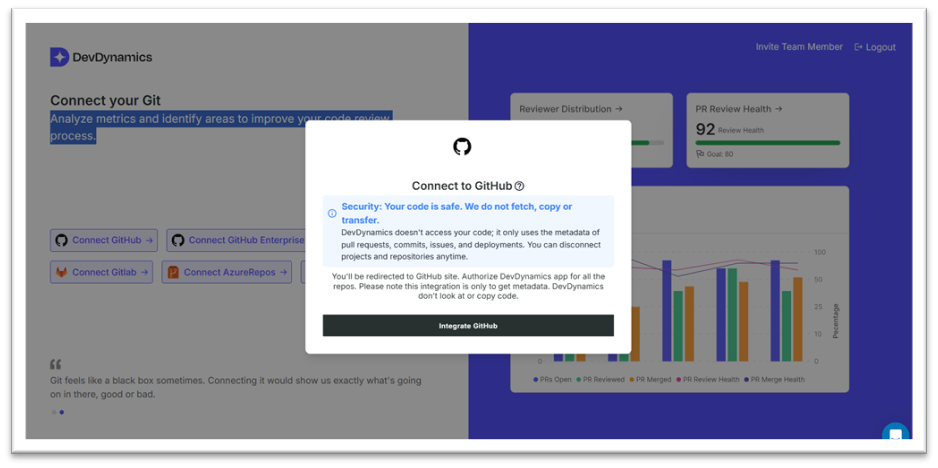
Step 4 — Connect Git hosting (example: GitHub)
After verification, the onboarding flow opens. Click Connect GitHub. DevDynamics uses repository metadata only (commits, PRs, issues, checks). Source code is not fetched.
- A security dialog explains what is accessed. Click Integrate GitHub to continue to GitHub.com.
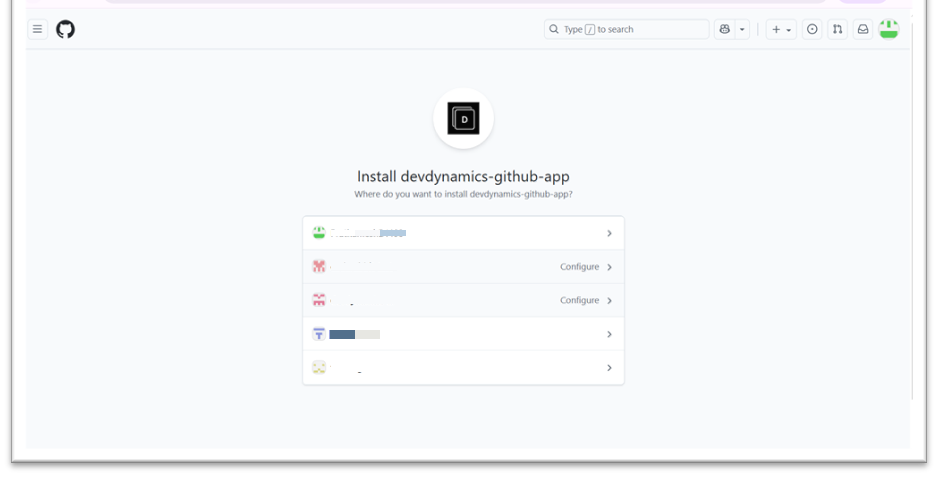
- On GitHub, choose where to install: your personal account or a company organization.
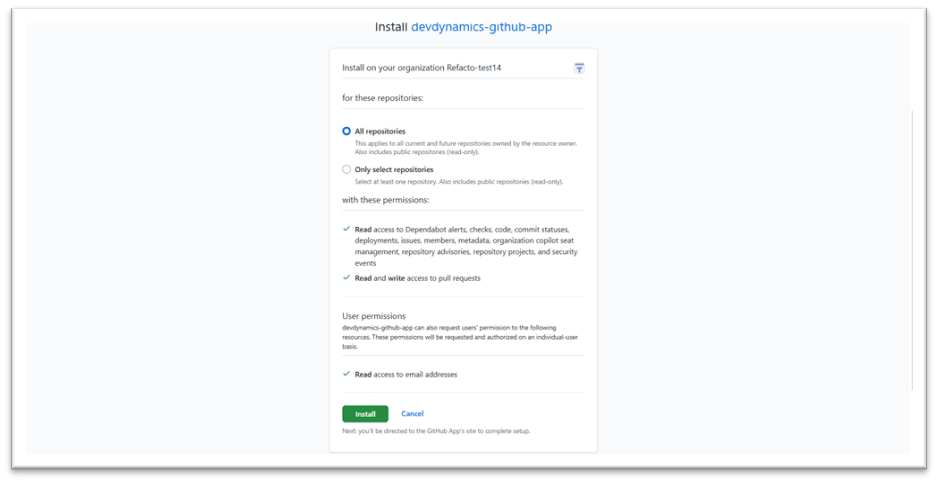
— Install the DevDynamics GitHub App (permissions)
- Select All repositories (quickest) or Only selected repositories (recommended least‑privilege).
- Review permissions: read repo metadata/events; read/write pull requests (needed to compute review metrics).
- Click Install. You return to DevDynamics after approval.

If you do not have permissions:
• Click Request when prompted and share the install page link with your org owner.
• As a temporary option, install on your personal account with a couple of public test repos.
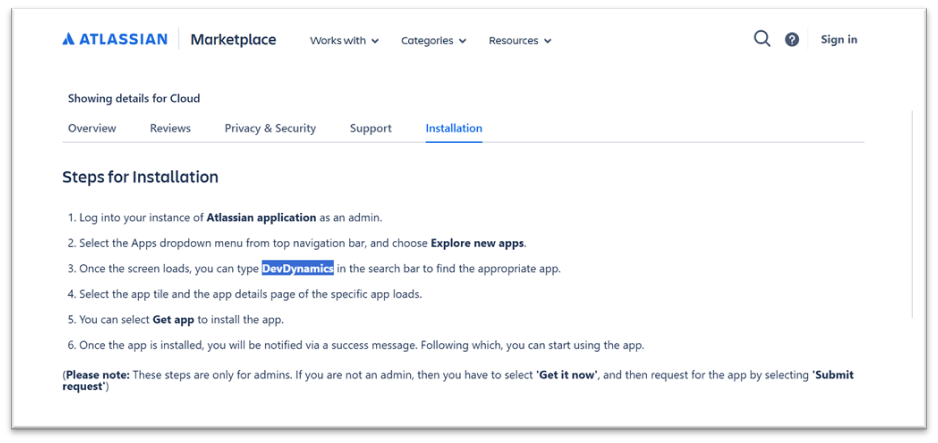
Step 5 — Connect Jira (issue management)
- In onboarding, click Connect Jira. Paste your Jira Cloud or Server URL (e.g.,
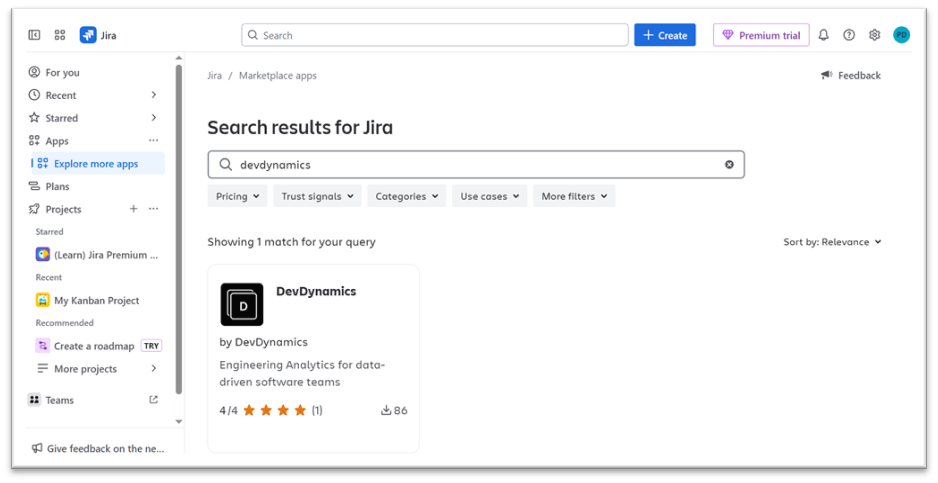
https://yourcompany.atlassian.net). - Click Integrate Jira. You'll be redirected to Atlassian Marketplace to install the DevDynamics app.
- Admins can click Get app to install. Non‑admins click Get it now to submit a request to the admin.
Jira Cloud vs Server notes:
• Jira Cloud: You'll install from the Marketplace page; no server changes required.
• Jira Server/DC: Ensure your instance is reachable by DevDynamics per your company policy (allowlist/tunnel).
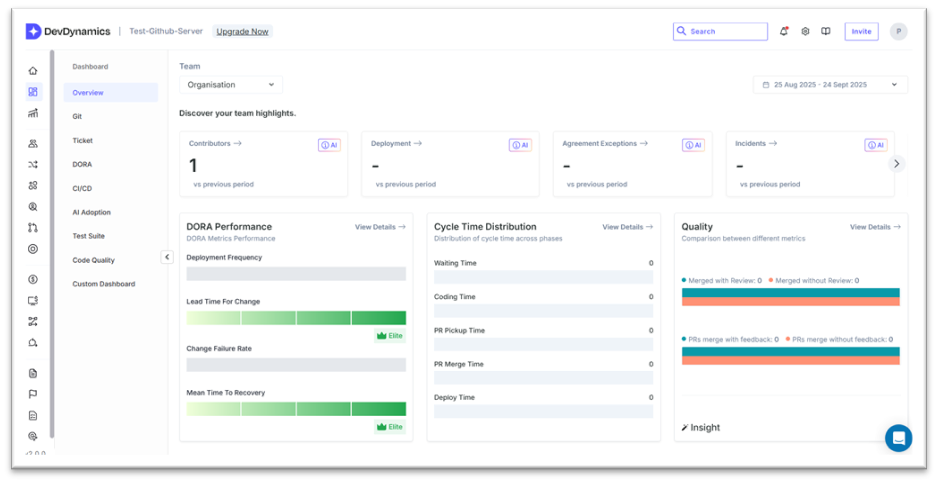
Step 6 — Dashboard tour (what you will see)
- After integrations, you are redirected to the Dashboard. Initial widgets may be empty while data sync runs.
- Key cards: DORA Performance, Cycle Time Distribution, Quality, and Team highlights.
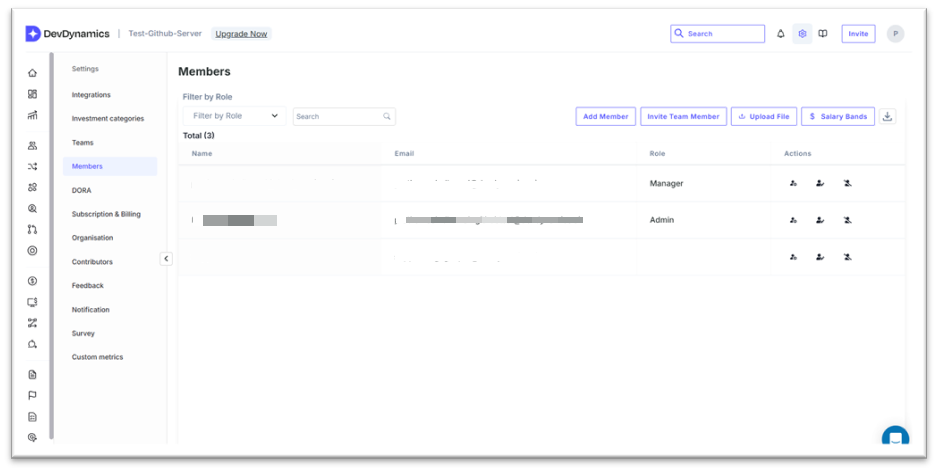
Step 7 — Invite members & create teams
- Go to Settings → Members → Add Member. Invite teammates by email and assign roles (Admin, Manager, Member).
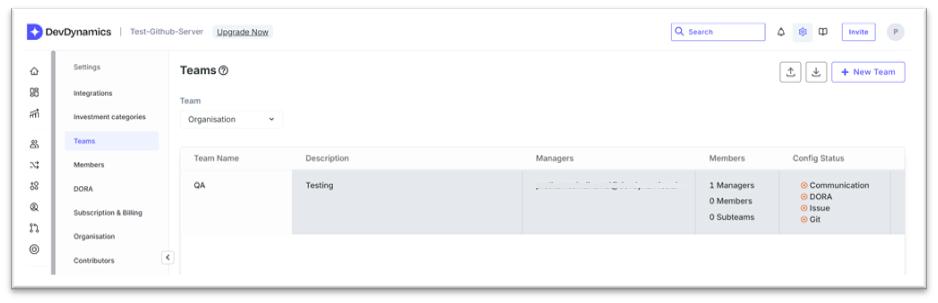
- Go to Settings → Teams → New Team. Name the team, add a description, and assign a Manager.
- Recommended: Create teams after Git/Jira sync so contributors are auto‑suggested correctly.
Step 8 — Confirm sync + verify integrations
- Check the bell icon (top bar) for Git initial data pull completed notification.
- Go to Settings → Integrations. Each connector shows status (e.g., Active for GitHub).

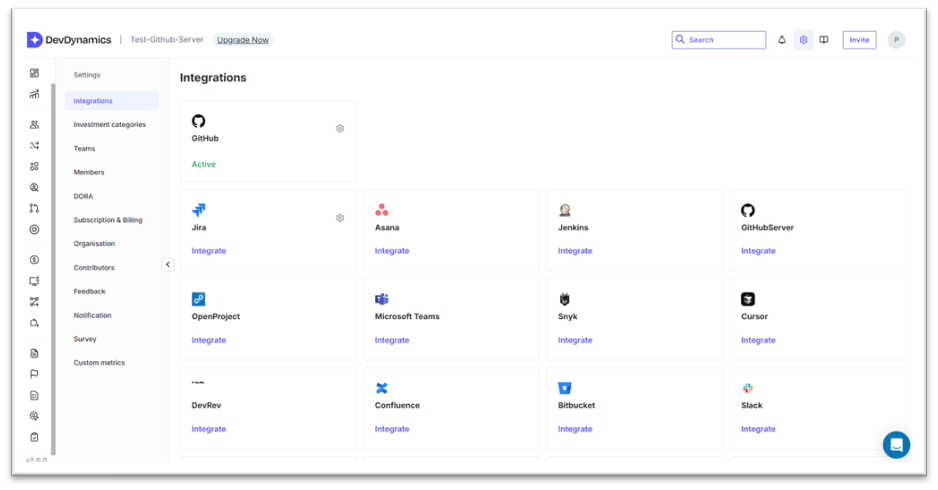
If status is not Active:
• Click the gear icon on the integration card to re‑authenticate.
• For GitHub org installs, confirm the app has access to the repositories you expect (select more repos if needed).
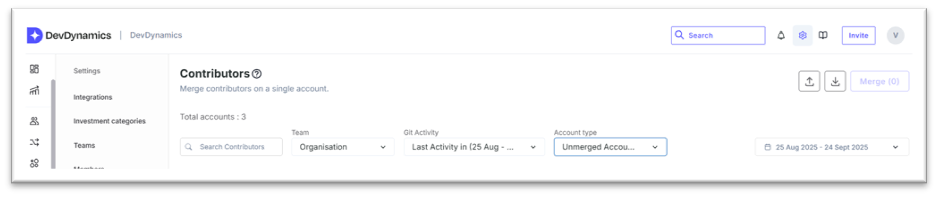
Step 9 — Merge contributor accounts (accuracy step)
- Navigate to Settings → Contributors.
- Set filters: Git Activity → Last Activity and Account type → Unmerged accounts.
- Select duplicate identities and click Merge. This fixes metrics when commit emails differ from login emails.
Step 10 — Start exploring value
- Open PR Review Health and Reviewer Distribution to see review coverage and speed.
- Check DORA to baseline your current capability; use the goal badges as targets (e.g., Review Health ≥ 80).
- Visit Metrics to explore trends by Team or Contributor.
Troubleshooting quick reference
- Email verification not received → Check spam/quarantine; allowlist domains; re‑register.
- Cannot install GitHub app → Ask an Org Owner to approve; start with selected repos.
- Jira app install blocked → Submit Get it now request to your admin; confirm URL is correct.
- Widgets empty after setup → Wait for first sync to finish; confirm Integrations status is Active.
Security note
DevDynamics analyzes repository and issue metadata only; source code is never fetched or copied. You can disconnect any integration at any time.